Get That Body Moving!

If you want the ball to get going you’ve got to get your body moving. For far too long the golf instruction community has restricted the pivot, but the advent of quality statistics and a deeper understanding of what truly matters in golf has opened our eyes to the value of distance. I get it - we’re all getting older. Me too! We must wage the battle against slower and smaller golf swings on a daily basis. This video in my “3 Keys Series” will help…

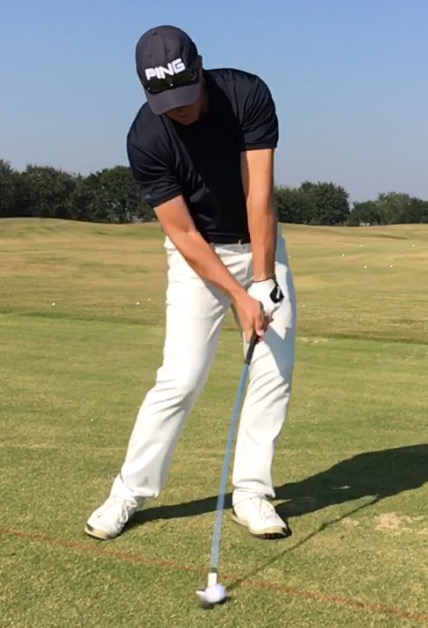
If you’re a seasoned veteran or someone that’s new to the game, these keys will help you hit the ball with more authority:

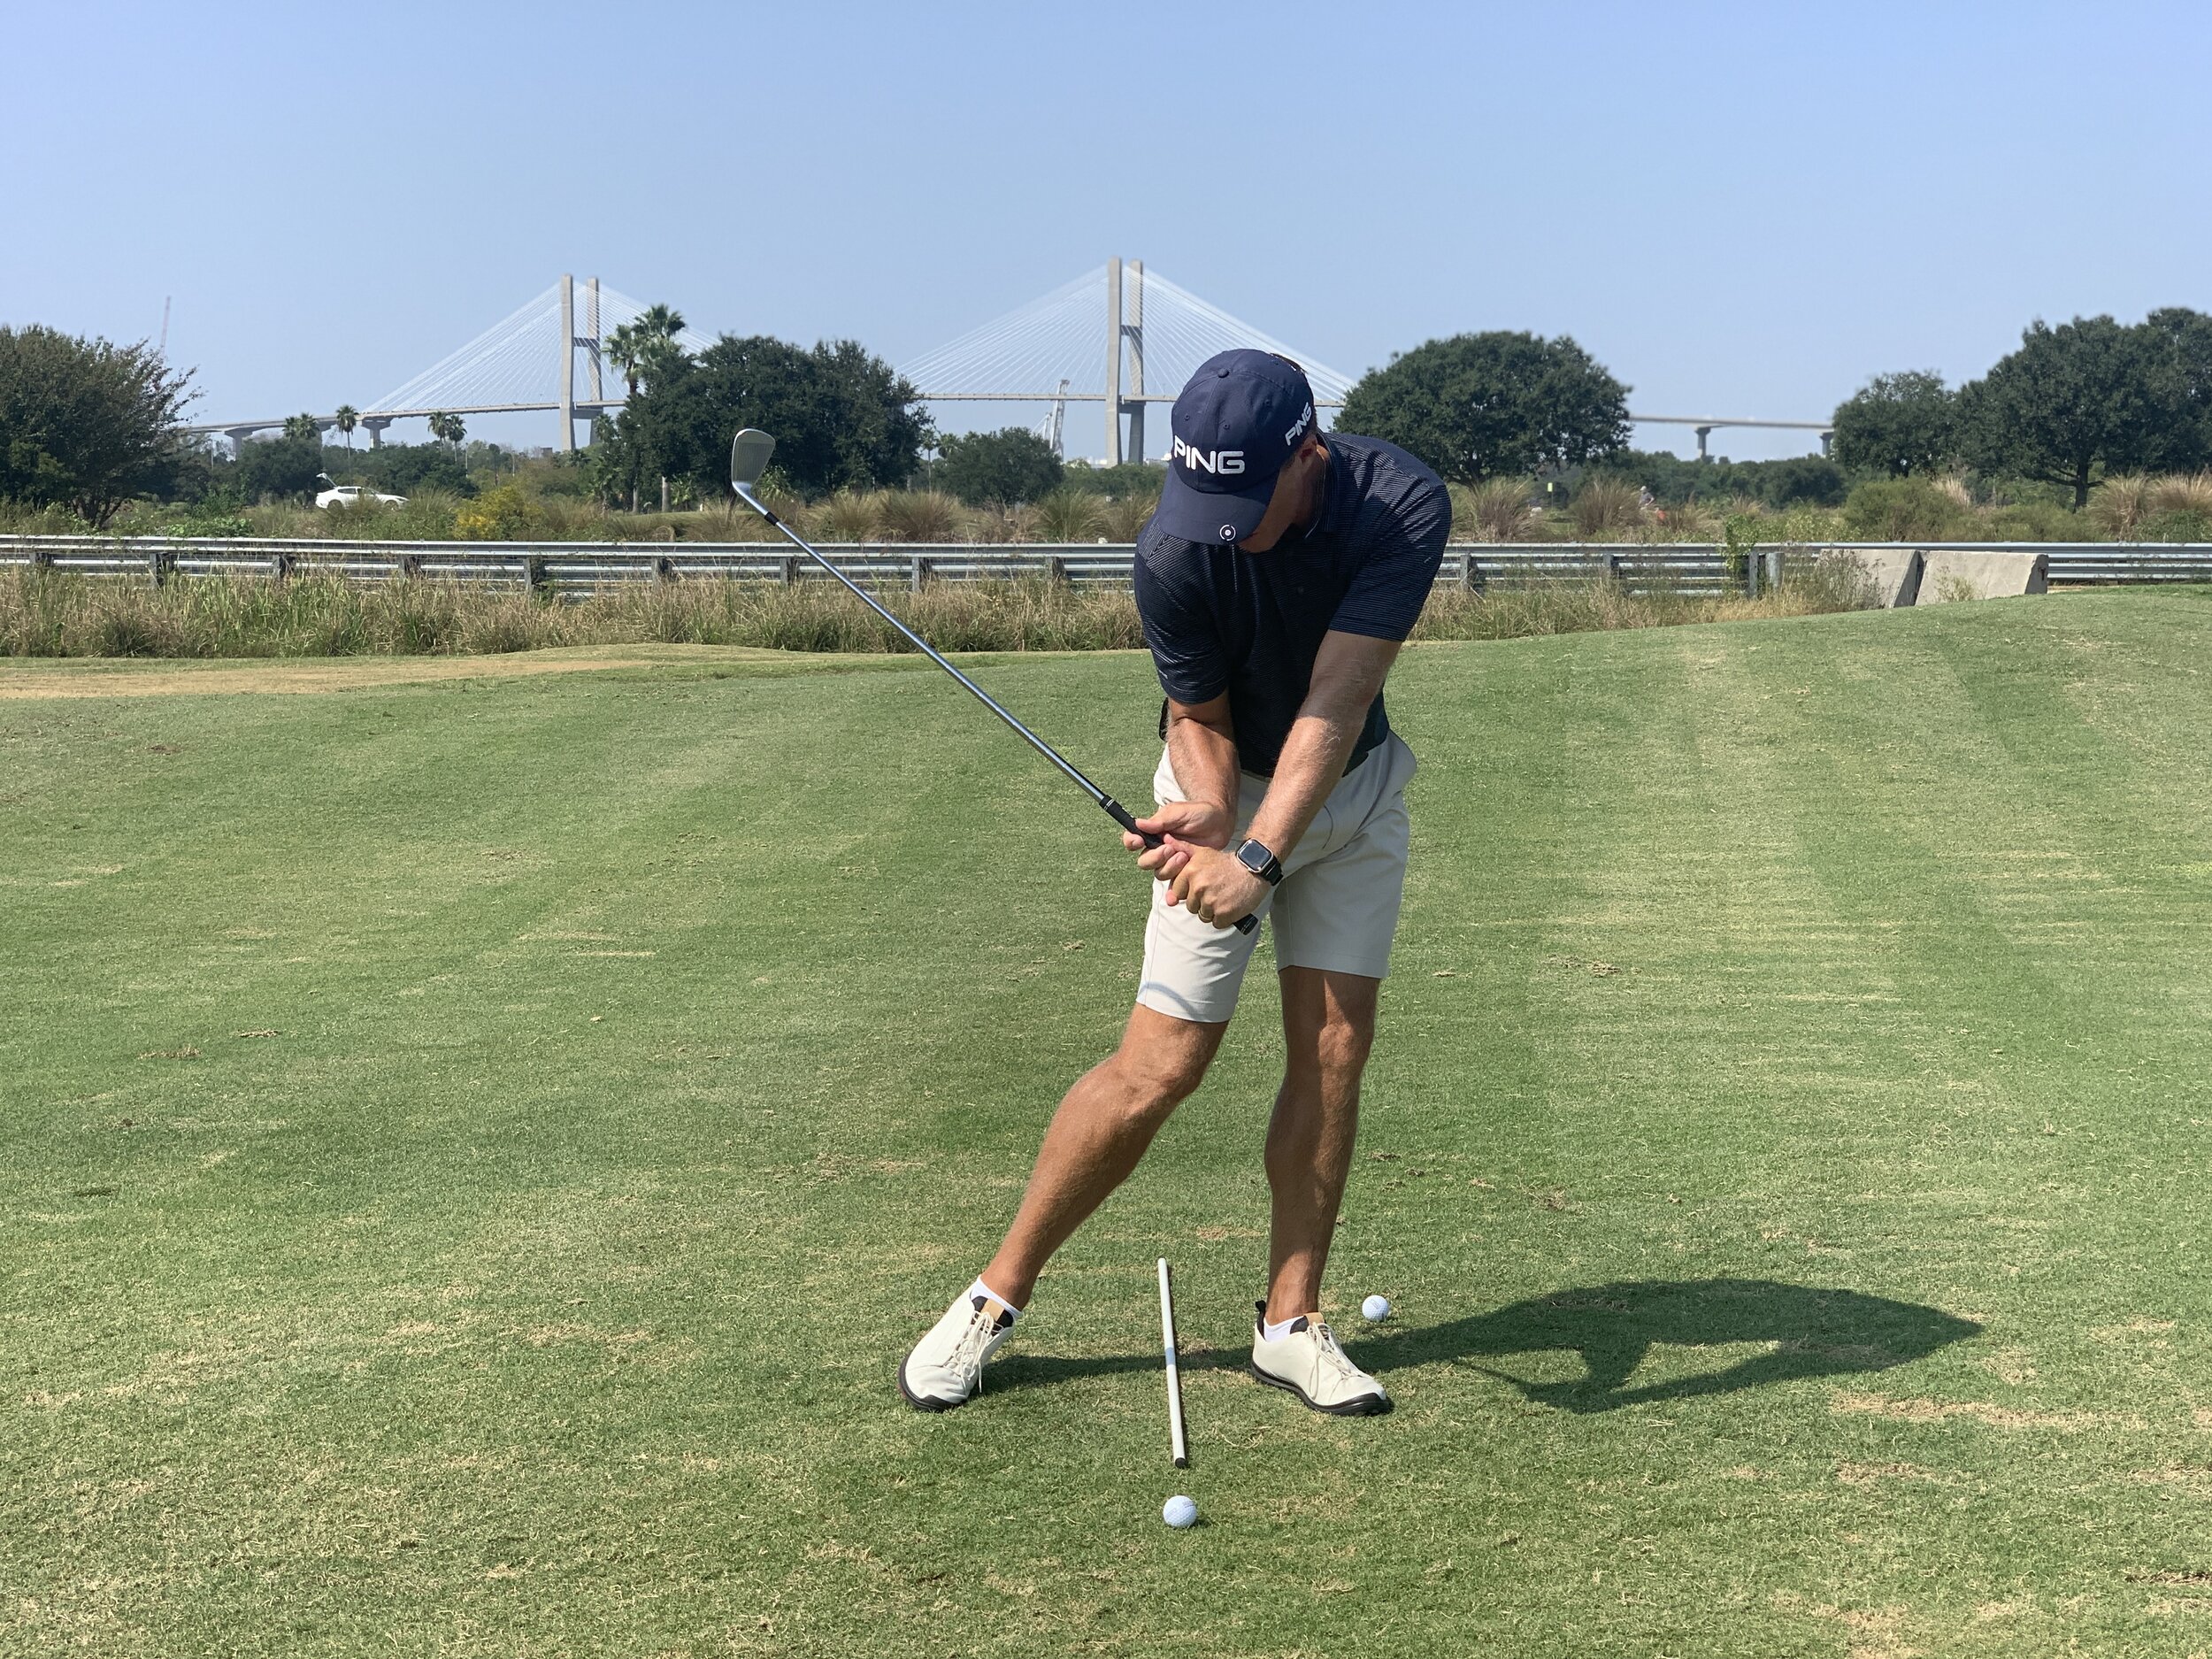
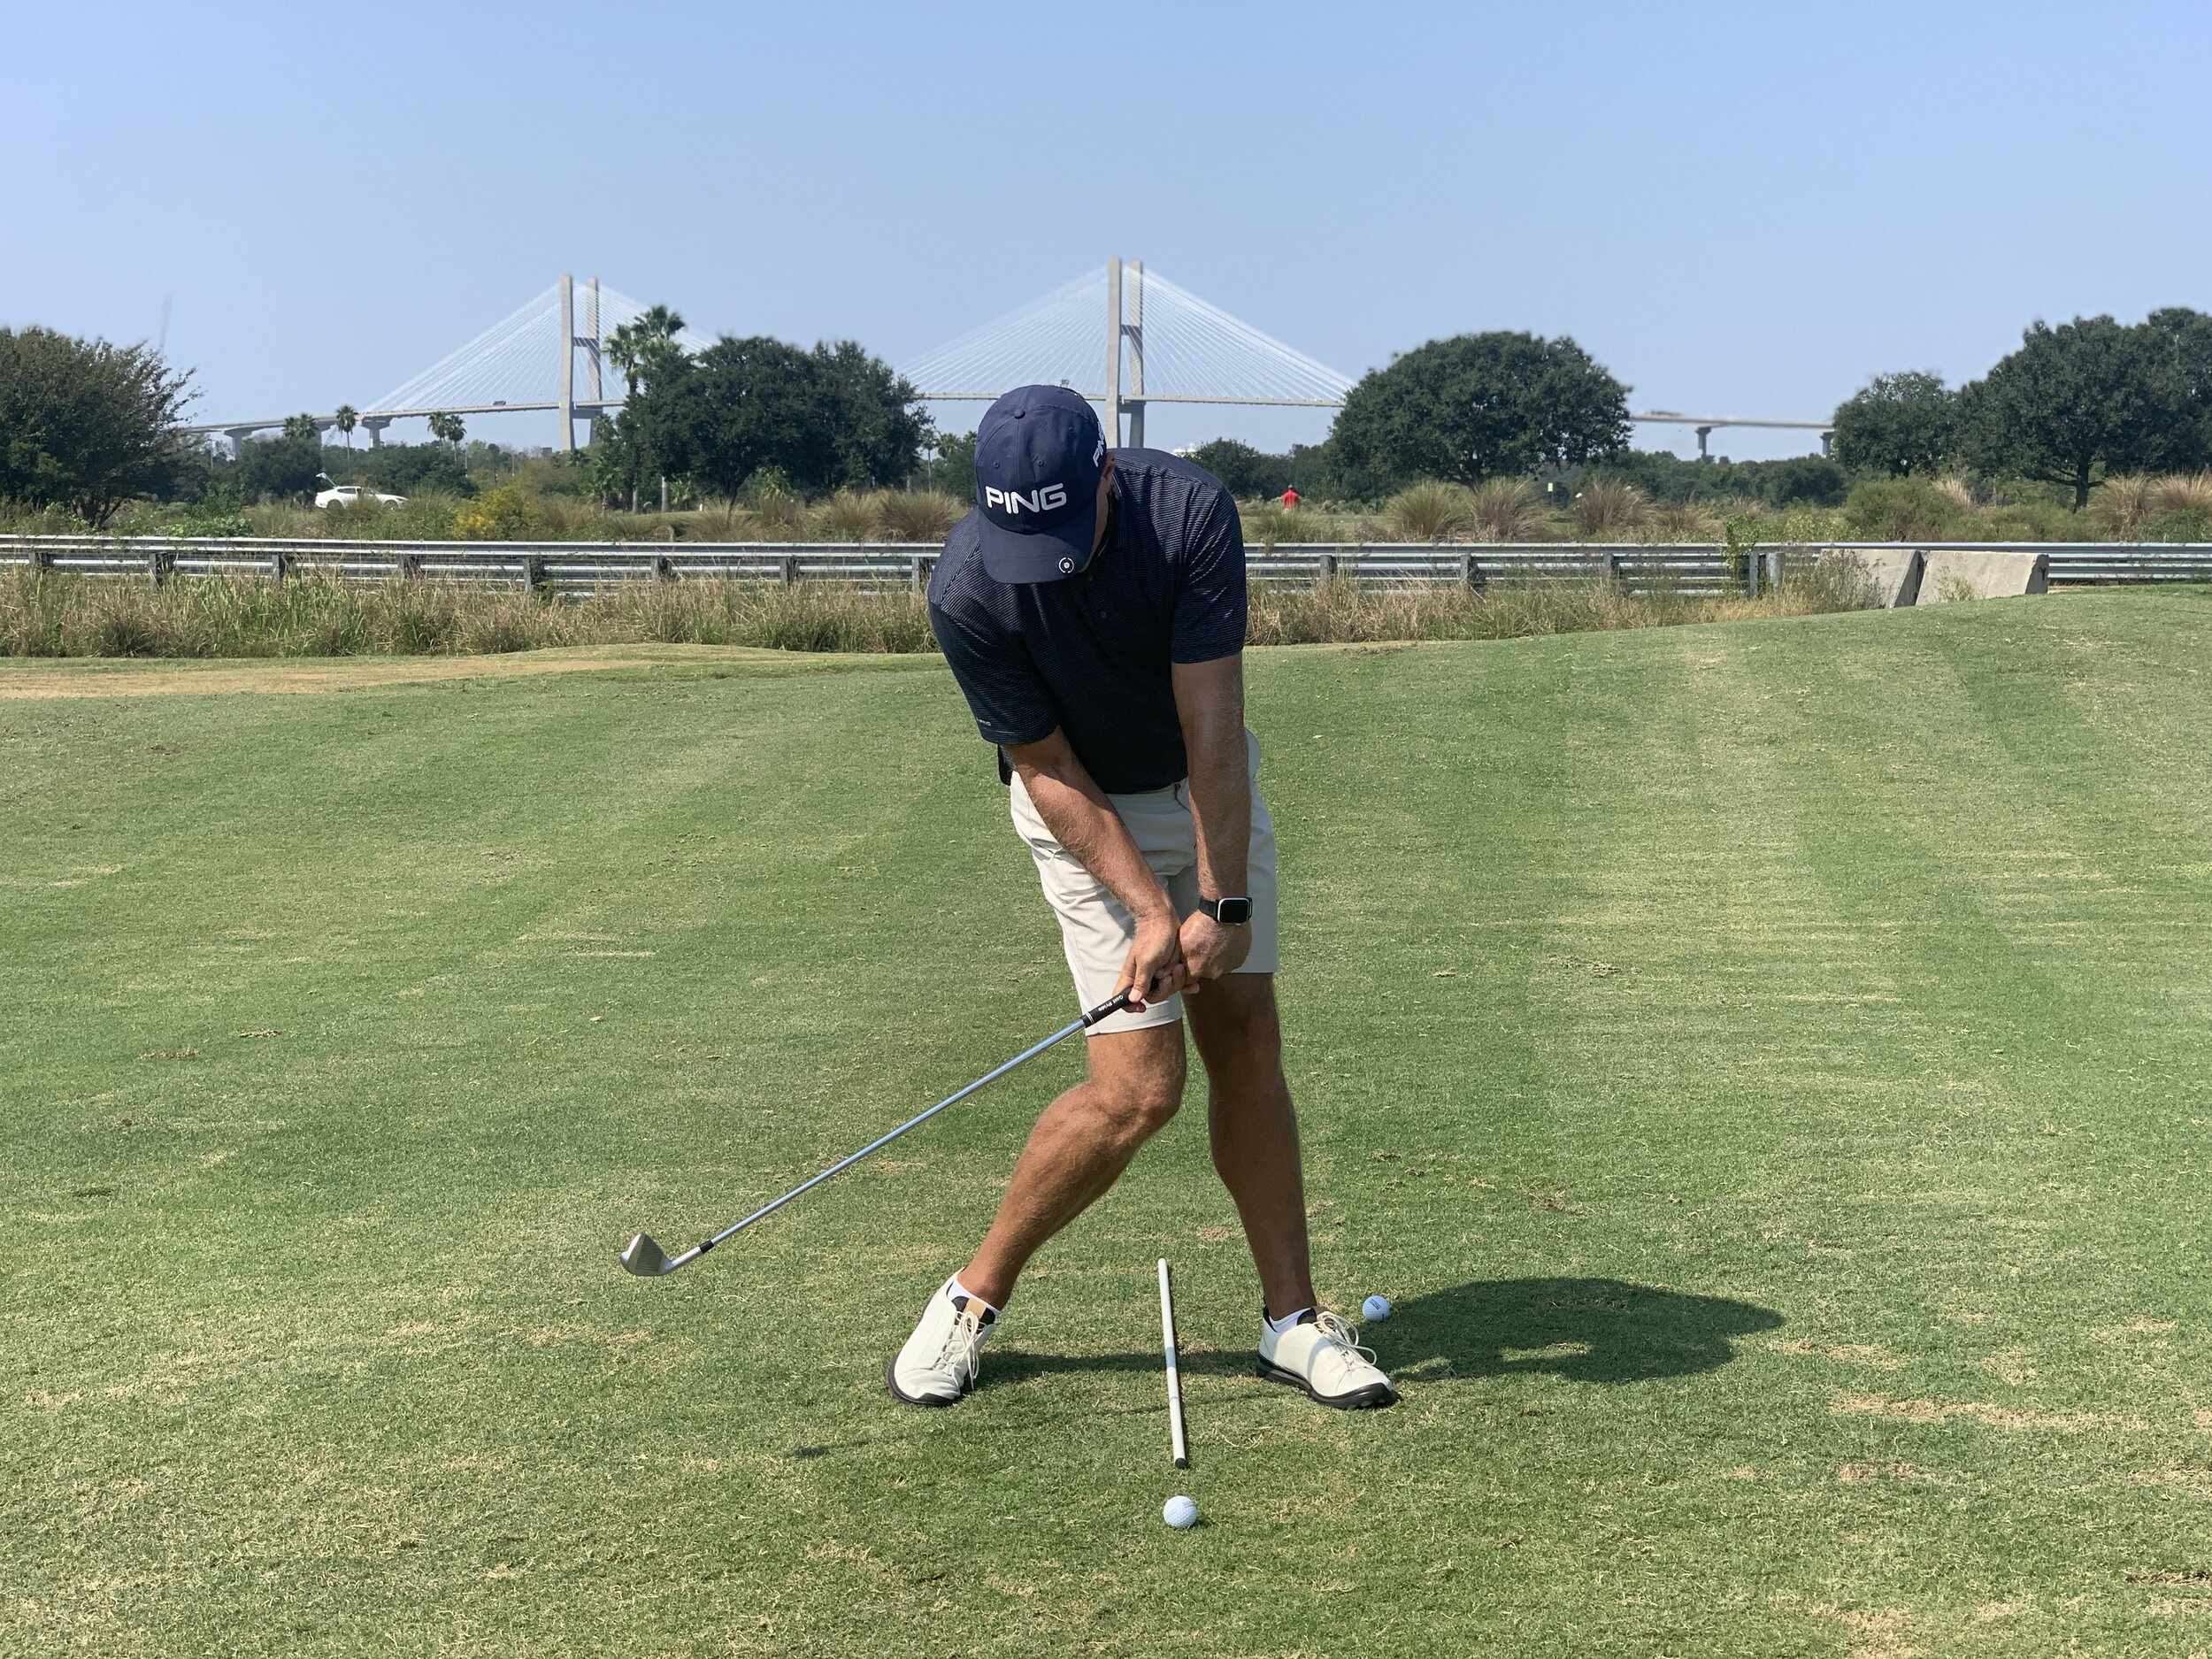
  1. Allow the lead heel to get up off the ground in the backswing and free up the lower body.

  2. Get your belt buckle pointing away from the target as much as you physically can in the backswing.

  3. Feel the lead shoulder stretch away from the target so that you can really feel the tension and torque in your body as you wind up.

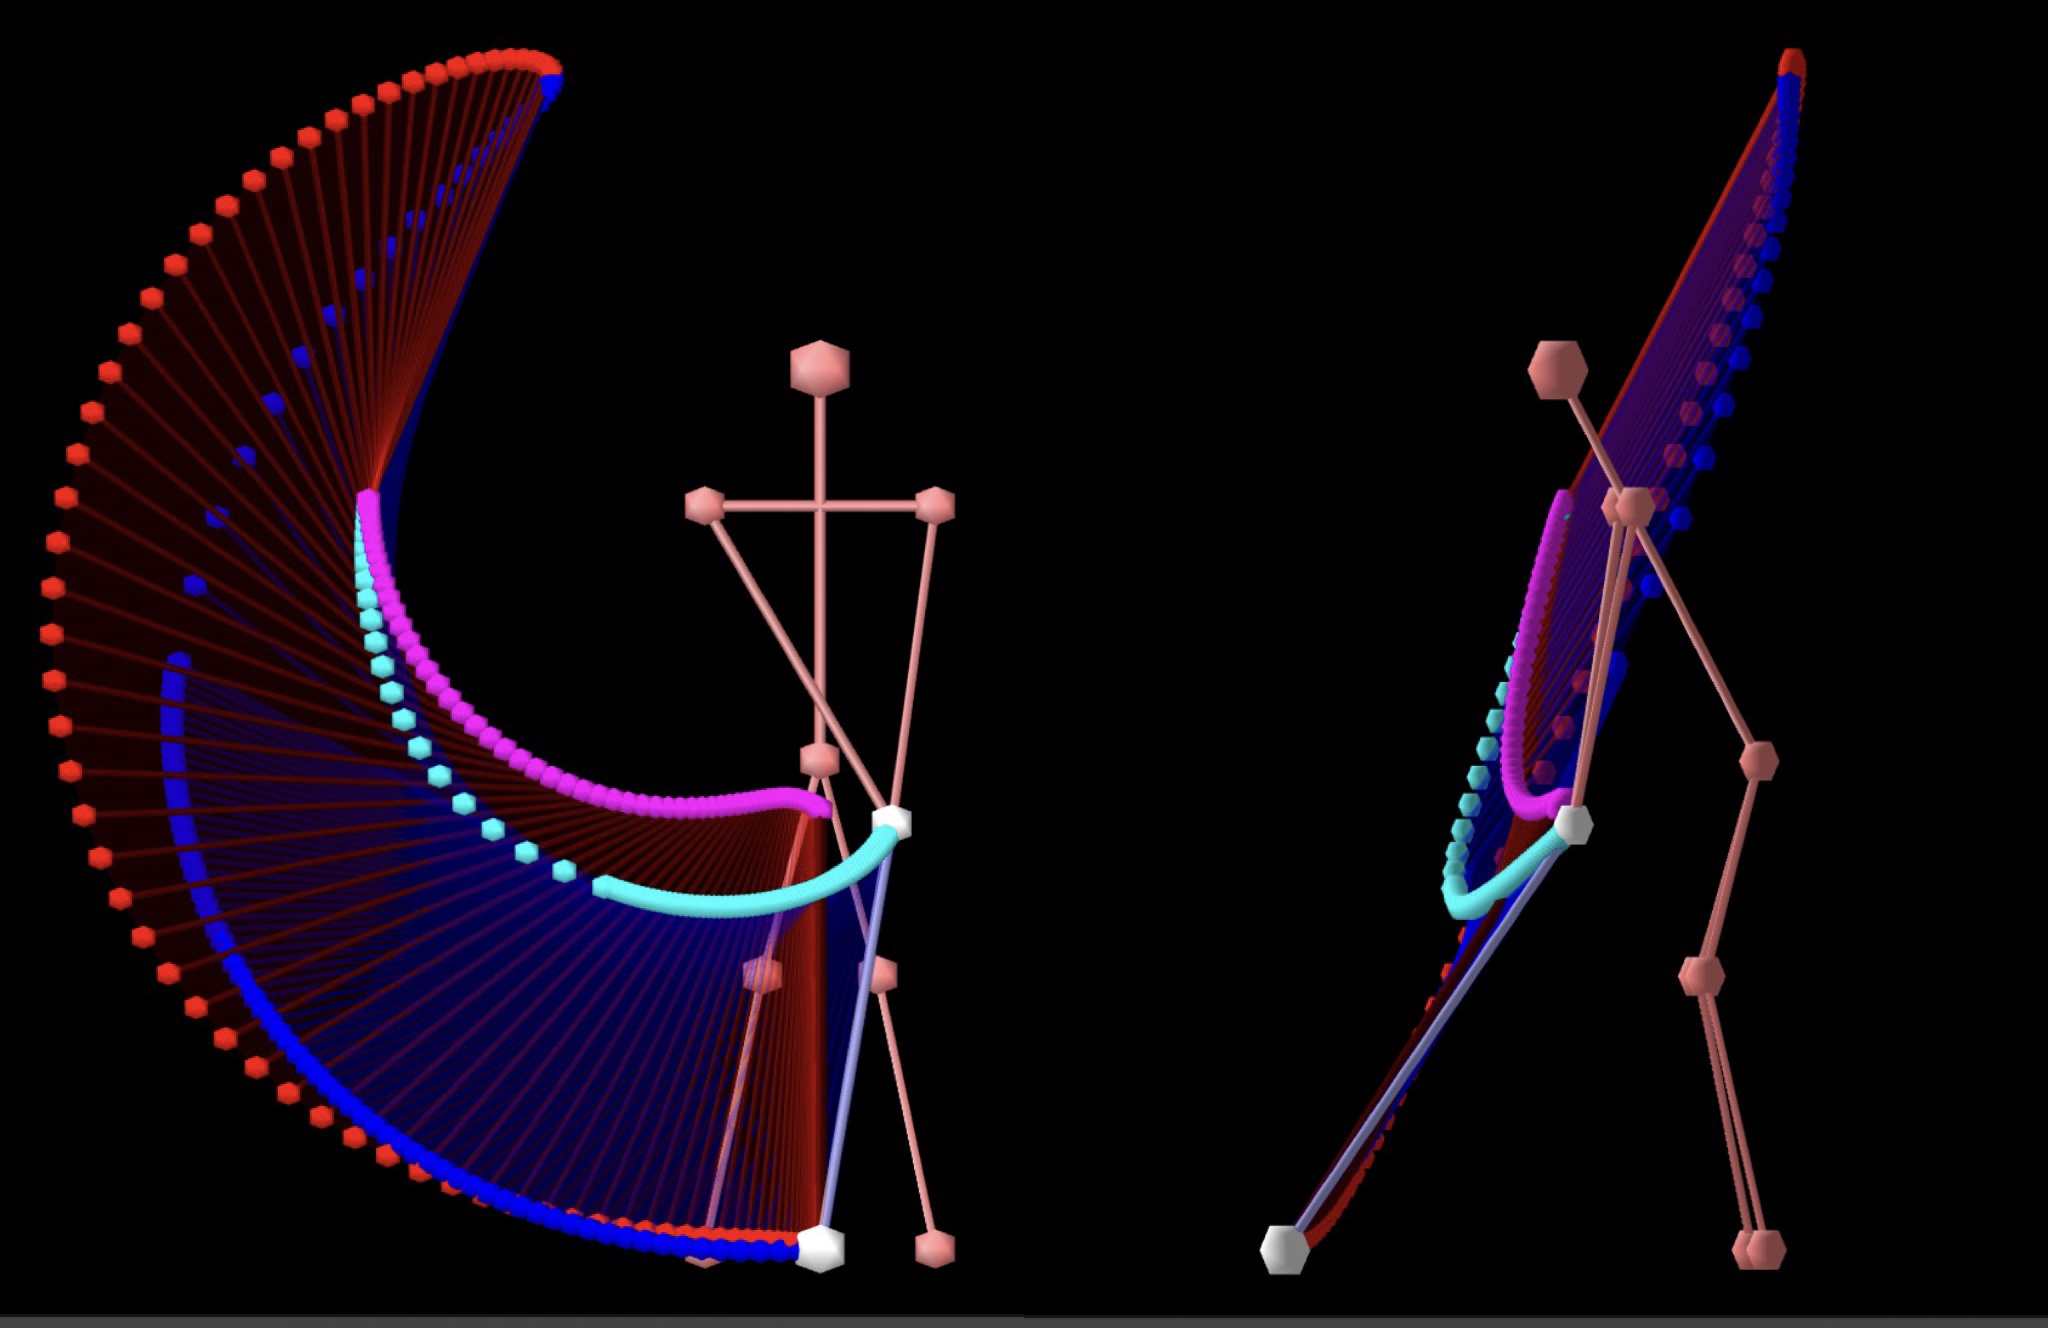
I would encourage everybody to start doing this at home with out a club and in front of a mirror. You most likely know what it should look like, but we all need to get a feel for the right look. A mirror will help! From my own experience in working to incorporate these elements into my golf swing it will take some time as you get more comfortable with the bigger pivot, but the gains far outweigh the discomfort.

Stay patient and never give up trying to get better!

Sam Snead

Sam Snead


Take Swing Changes to the Course

If I had a dollar for each time a golfer has said, “I’m great on the range, but I just can’t take it to the course” I’d be a wealthy man! I believe there are multiple reasons for this quandary many find themselves in. Firstly, most golfers don’t know how to practice in order to simulate an on-course environment and secondly it’s because when most golfers work on technical changes they don’t know how to go about assimilating the new moves into a full speed swing. Today we are going to address this important topic: How to take ownership of swing upgrades. Watch…

A few key points:

  • Use a 7 or an 8 iron

  • Use an alignment aid

  • Incorporate multiple rehearsals between each shot (get the FEEL!)

Level 1

  • Technical, slow , tedious and deliberate

  • Ball on a tee

  • Feel the positions

  • Incorporate pauses in the motion

  • Lots of rehearsal

  • Soft, tapping little shots

Level 2

  • Blend in rhythm

  • Slow motion without any pauses

  • Ball on starts a tee and then we get it on the ground

  • Lots of rehearsal between each shot

  • Shots will not go very far

Level 3

  • Start off at about 3/4 speed

  • Ball on the ground

  • Slowly build up to 100% speed

  • Continue to make rehearsals between each shot

Keep in mind that objective of any technical swing work is to upgrade the mechanics while still operating at full, or perhaps even, faster speed. It’s also important to note that this method of practice only addresses the technical side. There is so much more required in order to take it to the course and that’s why I often talk about…

SWING, SKILL & SHOT.

Thanks for tuning in and please share with a friend who you know would benefit!

7.jpg


TrackMan: Definitive Answers at Impact and Beyond

trackman 4

trackman 4

Here is some interesting, albeit older, data mined by TrackMan from the PGA and LPGA Tours….

(Please note that these are all averages)

  • PGA Tour - Each club in the bag hits the ball the same average height30 yards.

  • LPGA Tour - Each club in the bag hits the ball the same average height25 yards.

My take away here is that slower club speeds will typically always hit the ball at lower peak heights than players with higher club speeds. My findings using TrackMan over the years have also shown me that slower player typically need to deliver more loft at impact, they need less shaft lean and they need to hit down less than their higher speed counterparts.

  • In conditions that eliminated any roll, an average PGA Tour player would hit a driver and a 5-wood 500 yards; a driver and a 7- iron 441 yards; and a driver and a PW 405 yards.

  • In conditions that eliminated any roll, an average LPGA Tour player would hit a driver and a 5-wood 405 yards; a driver and a 7- iron 361 yards; and a driver and a PW 327 yards.

I’m not sure about you, but those are some hefty differences. Far too many courses I play have the ladies tees way too far back! I find that in general, both men and women play golf courses that are too long for them. An interesting exercise is to multiply the distance you CARRY a 5 iron by 36 - that’s the maximum length golf course you should be playing.

  • The carry distance gaps between irons for PGA Tour players are typically greater from club to club than they are for LPGA Tour players.

This indicates that higher speed golfers have an easier time spotting a distance difference between each club. It’s amazing how many ladies say they hit all their irons the same distance! You don’t, it’s just quite often difficult to determine much of a difference. As overall club speeds get slower the player should ideally carry fewer clubs so as to be able to establish differences between clubs and reduce overlap.

Tony Finau using Trackman at Ping HQ

Tony Finau using Trackman at Ping HQ

Some useful General information:

  • Shot direction is primarily determined by a combination of face angle, club path and impact location.

  • The ball launches primarily in the direction of the club face - approximately 75-85% on full shots.

  • For putting, shot accuracy is determined primarily by the face angle - the softer the hit (as in chipping and putting) the greater the effect of clubface. In putting the face accounts for 95+% of where the ball goes.

  • Face angle (largely) determines the launch direction while shot curvature/shape is mostly determined by the club path relative to the face angle. Think of it this way: when a ball is struck with a descending blow, i.e. ball first, ground second, the attack angle is down, yet the ball goes up. The ball goes up due to the angle/loft of the face!

  • The initial ball direction falls between the club face angle and club path yet it greatly favors the face angle.

  • The further apart the club face and club path diverge from each other (basically - point in different directions) the more the ball's spin axis tilts and the more curvature exists on the shot.

  • There isn’t really ever side spin - it is merely back spin on a tilted axis and the more the axis tilts, the more the ball flight curves.

  • The average male golfer swings a driver somewhere between 82 and 88 mph.

  • A carry distance of 100 yards for ladies is typically equivalent to a carry distance of 130 yards for men; 200 yards for ladies is equivalent to 250 yards for men.

  • A par four of 350 yards for ladies is typically equivalent to a par four of 430 yards for the men.

  • The most important factor in increasing carry distance is clubhead speed. With the driver, for every 1 mph you add to your swing speed you stand to gain around 2.75 yards.

  • An increase of 1” in the length of a club will typically only increase the clubhead speed by 1 mph.

  • The quality of the hit is very important as it relays clubhead speed into ball speed. Smash factor is calculated by dividing the ball speed by the clubhead speed. A smash factor of 1.5 is most often only attainable with the driver.

  • The ball spends 1/2000th of a second on the clubface. That means it would take a scratch handicap golfer almost 28 rounds of even par golf to have the ball be on the clubface for one second!

I have been privileged to have access to TrackMan in my teaching for almost 10 years now. I can unequivocally say that it has helped become a better teacher and coach. Yes, it’s a costly piece of equipment, but one that has paid dividends time and time again for me. There is no possible way I would be where I am today without this little orange box!

SBP_3926.jpg

How to Shallow the Club Properly

The first question you should be asking is why on earth would anyone want to shallow the club? The primary reason is to stimulate some body/pivot rotation through impact in order to better manage the face angle. This leads to improved predictability. Watch this…

  1. Watch for shallowing in a false fashion where the CLUBFACE becomes compromised leading to a flip through impact.

  2. Watch for shallowing by tipping the spine away from the target where the PIVOT rotation becomes compromised.

A great take home exercise is to get in front of a mirror with a club (be careful!) and 1. Feel the wrist twist on the way down in order to position the clubface for success and 2. Feel the lead shoulder staying lower for longer in transition.

Create the right look, and it’s okay if it’s exaggerated, in front of the mirror and take the necessary feels with you to the practice ground.

Don’t spend an inordinate amount of time with the Wall Scraper Drill, but give it a half dozen attempts or so just to help with organizing the appropriate sense and feel for what a proper shallowing motion really feels like.

All the best and feel free to reach out should you have any questions. Thanks for watching/reading and I sincerely hope this helps your ball striking!

A properly shallowed downswing…

A properly shallowed downswing…

Understanding Attack Angle

TrackMan defines attack angle as the direction the club head is moving (up or down) at impact. How much the club head is traveling up or down is reported in degrees… 2º up or 6º down. You’re no doubt reading this in an effort to improve your golf and the purpose of this article and video is to share my experience pertaining to attack angle and how you can use this knowledge to upgrade the trajectory, shape and strike of your shots. Watch…

We need to be on the same page with a few important points in order for a better understanding to take place…

Club Delivery

  • a narrow downswing will typically encourage a steeper, more downward angle of attack

  • a wider downswing will typically promote a shallower, less downward angle of attack

Narrow Downswing

Narrow Downswing

Wider Downswing

Wider Downswing

Club Path

  • an overly downward strike will move the club path more from in to out

  • an overly upward strike (driver typically) will move the club path more from out to in

Club Speed

  • a faster club speed allows for the golfer to hit down more and still maintain a functional flight

  • a slower club speed requires for the golfer to hit down less in order to maintain a functional flight

Keep in mind that hitting down does not make the ball go up! For more information on this point please watch this brief explanation.

Compression

  • please keep in mind that hitting down more does not equate to greater compression for ANY shot

  • watch this video to better understand compression

Divots

  • please stop trying to decipher the meaning behind ANY divot

  • the only take away from divots is that if there is dirt flying everywhere when you practice, you MIGHT be hitting down too much - period!

There you have it. I hope that perhaps some of this insight will help you to better understand the details of YOUR golf swing and what you can work towards in order to improve the quality of your shots and your experience out on the golf course.

If you have a friend that might benefit from this article/video then please feel free to share it. Thanks for reading and for your support.

Downswing Matters...

Most of you have been following me for long enough to know that I believe the location and orientation of the clubhead in the early downswing are vital to an effective golf swing. The appropriate position and orientation of the clubhead will enable you to rotate freely through impact, controlling the face and compressing the golf ball. The following short video will help you understand the value of clubhead position in the early downswing and why it’s so important in building a sound impact position

Where you position the clubhead in the early downswing is integral to your ability to rotate and manage the club face through the impact interval. Better rotation means less flipping and more accurate shots. This matters - big time.

In the following short video you will learn why, even though you may have been doing a better job with positioning the clubhead (shallowing the shaft), your game has not improved. Improper shallowing can compromise the club face angle in the early downswing and actually promote active hands or flipping through impact. Here’s the remedy…

There you have it. Getting the clubhead deeper (more BEHIND you) in the early downswing without compromising the face will produce incredible results for almost every golfer I teach. I suspect it will help your game too. A good place to start is in front of a mirror - create the proper look, don’t worry about exaggerating things, take the appropriate feel from that look and go out and practice. Keep reinforcing in front of the mirror.

A Young Jack Nicklaus

A Young Jack Nicklaus


Playing and Practicing in the Wind

For most of us, there is seldom a day that involves golf, that doesn’t involve some form of wind interference. When I first started trying to better understand how wind effects both the ball and the golfer. I was shocked at how little quality information was readily available. It didn’t take me long to conclude that most golfers (pros included) will underestimate the effect of a headwind and overestimate the effect of a tailwind. I have come to find the following to be quite accurate for most ‘normal’ ball strikers…

The basic formula for hitting into a headwind is as follows:

  • 5mph = 5% of the total distance + 5 yards

  • 10mph = 10% of the total distance + 5 yards

  • 15mph = 15% of the total distance + 5 yards

  • 20mph = 20% of the total distance + 5 yards

This formula appears to hold true for most ball flights. If you tend to be a high launch/high spin golfer or low launch/low spin golfer you might find your results to be different. Keep in mind that the majority of golfers will typically overestimate the MPH factor. If you’re serious about your golf, you may want to look into picking up a wind meter. This is the one that has helped me gauge the wind more accurately. As you learn to do a better job gauging the wind I’ve found things to be easier if I keep my guess-timations to 5/10/15/20mph. It just serves to simplify something that can become overly complex.

Let’s not forget we hit shots downwind too:

  • 5mph = 2% of the total distance

  • 10mph = 3% of the total distance

  • 15mph = 5% of the total distance

  • 20mph = 7% of the total distance

As you can see a tailwind will have far less effect on the carry distance than a headwind might. As a result there can be no such thing as a one-club wind!

What about practicing in the wind? My experience is that wind will not only effect the ball flight, but it also has an effect on the way in which the golfer will swing the club. Here are a few of my findings:

  • Every golfer tested hits more down and delivers less loft into the wind

  • Every golfer tested hits less down and delivers more loft down wind

  • Every golfer moves their typical club path into the wind eg. a left to right wind always caused a golfer to swing more left

Using this information I would advise golfers:

  • Who hit down too much or who hit the ball too low to practice in downwind conditions when possible

  • Who hit the ball too high and tend to get scoopy to practice hitting into the wind when possible

  • Who curve the ball too much to the right to practice with the wind coming from the right when possible

  • Who curve the ball too much to the left to practice with the wind coming from the left when possible

Now of course if you’re headed out to practice and the wind conditions just simply don’t match what you might need that might indicate a good time for a ‘shortgame’ practice session.

Royal Portrush

Royal Portrush

I hope you find this information to be both beneficial and interesting. If you do please consider sharing it with a golfing friend.

Making Gains

It seems like just the other day that I embarked on my teaching career, yet it was almost 30 years ago. As a young coach it didn’t take me long to get to a point where I thought I pretty much knew everything there was to know about the golf swing. My how things have changed! I remember saying that one day on Tour we would get to a point where there were no more ‘bad’ or unusual looking swings. Ha! Anyone seen Matthew Wolff’s golf swing?

ManyWays.JPG

When I first started coaching Phil’s backswing would have been too long, Bubba’s feet would have been too active, Jordan could never be successful with a bent lead arm, DJ’s club face would have been impossibly closed and Jim Furyk - well that just had no chance.

Perhaps it’s my experience speaking, but I believe the golf instruction industry has come a long way in the last two decades. We have made more progress in this time than all the years before. Our eyes have been opened to the uniqueness and intricacy of the golf swing and how there truly are many ways to get the job done. A better understanding of the forces and torques that golfers are exerting on both the ground and the club has opened our eyes to perhaps why the players pictured above are successful.

Another important revelation over the last two decades has been the value of skill. Your technique allows you to hit the ball towards your target, but its skill that enables you to adjust the flight, shape, distance and ultimately, the outcome of each unique shot on the course. So many golfers were falsely led to believe that if they simply upgraded their technique/mechanics/swing they would be world-beaters. Technique, no doubt plays a role, but the value of skill can no longer be over looked. The great Seve Ballesteros is a fabulous example of a golfer that relied more on skill, and heart, than technique…

Seve Ballesteros

Seve Ballesteros

I feel that the internet has been an important catalyst in our improvement and understanding as a community of golf coaches. Sound information is out there, if you simply know where to look or who to contact. I cannot overlook the role technology has played either. I know that having the opportunity to teach with TrackMan, SwingCatalyst and K-Motion over the years has served to make me a better informed coach.

We have also improved our knowledge of how people learn and we now know it’s not all about pounding balls and getting your reps in. Sure, we still need to work hard, but we have a better picture of how to effectively take full ownership of changes and better incorporate them into who we are as a golfer.

Are we there yet? Do we have all the answers? As an older, more seasoned coach, I never think I know it all anymore. Our understanding is significantly deeper than it was 20 years, but we still have much to do.

It’s an exciting time to be a coach and a golfer.

Let's Get This Straight!

If you, as most golfers do, struggle with consistency then this article is for you. We all do really! The number one culprit for off target shots is the club face being misaligned at impact. We struggle to control the face through the strike. This simple video will give you some insight as to how you can start to do a better job. Keep in mind we’ll never be perfect, but we can be better. Watch…

Far too often I see golfers consciously trying to swing down the line. This forces the hands out and necessitates a flip through impact. You can hit good shots with a flip, just not enough consecutive good ones to play well for all 18 holes.

Here are a few keys:

  • Work the handle around the lead hip through and post impact. It turns the corner

  • The clubhead should arc back inside the flight of the ball very soon after impact whether you’re hitting draws or fades

  • Don’t be afraid to keep the club face relatively quiet, particularly if you struggle with blocks and hooks

Here is a simple half swing I made with a seven iron using a ClubHub sensor that clearly shows how the handle (light blue line) tracks inwards (and upwards) during the impact interval.

ClubHub 3D Track

Get to the range, start with the small shots I demonstrated and I believe you’ll very quickly gain a sense of how this works to quiet the club face through that all important strike zone.

Thanks for reading.

Should you be interested in getting together for some work on your golf game click HERE.

Fancy Footwork

At our most recent Coach Camp, I had the opportunity to learn from Kevin Duffy. Kevin is trainer to a number of the world’s best golfers and shared a few of his insightful ideas pertaining to the golf swing. Watch…

Kevin advocates so much more than I’m capable of sharing with you here today, but a few of my take aways were:

  1. We should pressure the ground in the golf swing in a similar fashion to when we walk

  2. When walking we start with heel contact and pressure then transitions to the mid-foot, the pinkie and finally the big toe

  3. In the backswing the trail foot works as if we were walking backwards - big toe, pinkie, mid-foot and then heel

  4. The downswing is the opposite of the backswing with the trail foot moving from heel, to mid-foot, to pinkie and finally big toe

This may sound complex, but stand up and give this a try right now! It always amazes me when I do this how my hips rotate beautifully coming into the “strike”.

Here is a before and after image of a student I worked with recently where all we focused on was the sequence of pressure movement under each foot. You’ll not only notice how much more his hips have rotated through impact, but also how much better the arms and club face are positioned.

018B2DB2-A1C4-4244-8C21-8C70ECEA0740.jpg

Give this a try the next time you head for the practice ground and let me know how things worked out.

Thanks for your readership and support in 2018! I can promise more of the same quality of information for 2019. Have a Merry Christmas, Happy Holidays and may you be blessed in the New Year. Cheers!

Tales from the Trail Side

I’ve found that is can be tremendously helpful for any golfer to fully understand the ins and outs of impact. Today I want to address the trail side and what my preferences are for it as we approach impact. Let’s start with this…

What are we looking for at impact?

  • Hips and chest rotated open relative to the target line

  • The trail hip should be lower than the front side counterpart

  • As a result the trail leg is flexed and the knee has moved towards the ball

  • The trail arm is flexed

  • As a result the trail shoulder is lower than it started at address

  • The spine has tilted away from the target (side bend)

While generating speed can be genetic to a certain degree, our ability to control the club face at impact and thus the direction and shape of our shots is largely a product of both technique and skill. Merely posing impact, as I have demonstrated in the video above, might shed some light on what you need to work on in order to better control the strike and accuracy of your shots.

Brandon Stone

Brandon Stone

You might be shocked at your results when you can start to master the trail side through the impact zone. Now let’s get to work.

Clear as Mud...Balls!

mudballs

It's never a good feeling when you've striped one down the middle and you get to your golf ball only to see a large chunk of mud attached to one side of your golf ball. For years I had heard that mud on the right would cause the ball to go left, but I never was sure. The best way to build some clarity - do a test! Here's a sampling of what we found...

For the "Facts of Golf" series I filmed recently with Revolution Golf in conjunction with PING this was one of the first ideas we were interested in testing. Thanks to some guidance from Erik Henrikson, Director of Innovation for PING, these were our findings:

  • Mud on the left with a 'neutral' swing will almost always cause the ball to move strongly right in the air
  • Mud on the right with a 'neutral' swing will almost always cause the ball to move strongly left in the air
  • The large clumps of mud will be 'ejected' off the ball very quickly after impact, but it's the remaining small particles that alter the ball flight
  • Mud that's located on the top, front or back will cause for quite a significantly shorter shot without much directional change
  • It's hard to find good quality mud to do a test like this

Shot data for mud on the right (a fairly neutral swing) from TrackMan:

FullSizeRender 25.JPG
IMG_2524.jpg

Shot data for mud on the left (a fairly neutral swing) from TrackMan:

FullSizeRender 26.JPG
IMG_2527.jpg

As I hit each of these shots I was floored at how much the ball moved in the air relative to the feel of the shot. The feel was neutral, yet the ball seemed to take off with a mind of it's own. I hope this information helps you save a stroke or two the next time you encounter the dreaded mud ball!

Hitting Up on the Driver

I often conduct this demonstration for my Three Day Golf students where I hit back to back shots and attempt to illustrate the value of hitting up on the driver and what it could mean to their tee shots. For good measure I also throw in a little fade versus draw at the same time. 

My intent is to maintain a similar club speed from one swing to the next and if possible strike the ball in a similar location on the club face. As you'll see this was an occasion where I managed to get pretty close...

IMG_2039.JPG

This TrackMan screenshot illustrates the first shot where the idea was to hit down and across the target line, imparting a low launching and fading ball flight...

The First Shot

The First Shot

This TrackMan screenshot illustrates the follow-up shot where the plan was to deliver the club head to the ball with it traveling up and outward, imparting a higher launch and gentle draw to the ball flight...

The Second Shot

The Second Shot

Let's take a deeper look to see what some of the important differences are between these two interesting shots:

  1. Attack Angle - The 9.1º difference is the primary reason why the second shot traveled significantly further than the initial attempt. This was achieved with a change in tee height, address position and intent.
  2. Club Path - The almost 14º difference here will generally lead to a huge change in ball flight curvature. My findings have shown that when it comes to shot shape the club path plays a primary role.
  3. Launch Angle - The old adage of 'hit down to make the ball go up' takes a beating here as the shot hit with an ascending strike launches significantly higher.
  4. Club Speed - Nothing much to see here other than to verify that the club head for each shot is traveling at virtually identical speeds.
  5. Ball Speed - Another interesting nugget here is that while the carry and total distances are significantly different there is very little difference in the ball speed from shot to shot.
  6. Carry - Wow! That's amazing isn't it? While impact location for the second shot was slightly higher on the face (and a hint more toward the toe) which might lend to slightly longer carry distance the direction the club head was traveling (up and out) is the primary difference maker here.
  7. Total - As you might imagine the increase in total distance follows suit along with the increase in carry distance.

I know we could all benefit from a gain in almost 30 yards off the tee. And keep in mind that's at the same speed and with the same club! No need to hit the gym or shop for a new driver. This video gives some insight into what's required to affect the changes you've seen in this demonstration...

Thanks for reading/watching. If you need hands-on help with your game I'd love to host you in Savannah at the Westin Savannah Harbor Resort for either a lesson or a Three Day Golf School. Email terri(at)andrewricegolf.com for details.

You Need More Power

Yes! Don't we all? As with all things in life some things are easier said than done and this is no different, but it IS possible. Have you heard about using the ground to generate more power? This is what I'll be addressing in this article - pushing off the ground in order to generate greater club speeds and longer shots. Take a look...

So here's what we're looking for just prior to starting the downswing:

  • The trail knee maintains its position as the golfer starts the downswing. Just for a little while...
  • The lead side separates as the player glides into their front side. This creates some leg separation.
  • There should be a definite lowering or unweighting in the early downswing.
  • The late downswing should be characterized by an upward thrust away from the ground.

Notice in the image below how in the early downswing my belt buckle is significantly lower than it is half way through the follow through...

Image 11.JPG

This is something that all long drivers take full advantage of - that ability to really thrust up from the ground and in most cases actually push both feet off the ground. It's that push that will help to really get the clubhead moving. 

Thanks for reading/watching and if you have a friend who would really benefit from this information please share it.

Trajectory Tricks

The loft on the clubface at impact is largely responsible for the launch of the ball. When it comes to wedge play friction also plays a significant role in determining the launch angle, but the purpose of this article is to share an idea to help you improve the loft you deliver to the ball at impact.

Most of us will either hit the ball overly high or too low. This video illustrates a simple drill to get you to feel what you need to feel in order to grasp what is required to deliver either more, or less, loft.

For the high ball hitters:

  • Using a pitching wedge get set up with a narrow stance
  • Position the ball off the tip of your front foot
  • Feel the handle or butt of the club travel a long way forward into impact
  • It’s not easy but do all you can to hit low launchers

For the low ball hitters like me:

  • Stick with the PW and a narrow stance
  • The ball should be in line with the tip of your back foot
  • In the downswing you’ll feel the clubhead swinging a ton. The clubhead should feel like it outraces the hands
  • This will feel scoopy and that’s a good thing

Notice where my hands are just post impact in the image below - the low ball hitters need the hands less forward while the high ball hitters need to sense how much more forward they need to be…

It’s never easy making changes as they always feel so uncomfortable. Let’s get away from associating discomfort with ‘wrong’ as you work towards improvement. I know this exercise seems like it’s the opposite of what it should be, but as the task becomes more challenging (which this one is) we have no choice but to adapt.

The good news is that this drill applies directly to your long game too, so don’t be afraid to incorporate a few of these drills with those full swings too.

Thanks for checking in and I hope this helps you to enjoy your golf a little more.

How to Deal with a Headwind

Controlling your golf ball in the wind is one of golf's greatest challenges. For quite a while now I have been asking my junior players to hit a 140 yard approach shot directly into whatever wind might be blowing that day and none of them have ever reached the flag! Now, part of this is ego and another part inexperience, but being a curious coach I wanted to do what I could to help them play these headwind shots effectively. At Savannah Harbor we have a double sided range and in the spring we can experience some strong winds. The double sided range means that I can hit shots into and down the same wind. Having TrackMan is a huge help here as it tracks the ball accurately throughout it's flight. Watch...

After quite a bit of testing on and off the golf course I have found that this formula produces positive results. Please keep in mind that hitting any shot in the wind is not exact science and there will always be a subjective side to selecting the appropriate club and shot.

  1. Determine how many MPH of wind are blowing in your face
  2. If its 12 MPH then add 12 yards per 100 yards of distance required
  3. Determine what club you would need to hit the ball that distance
  4. Take one additional club and play a knockdown type shot

Example scenario: For a 140 yard shot into a 20 MPH headwind. I would add 28 yards (20 yards per 100) to 140 to get to 168 which is a full 7 iron for me. I would thus take a 6 iron and hit a knockdown for this scenario.

You might wonder how you'd come to recognize the wind speed...? Experience certainly helps, but there's nothing against checking a weather app on your phone prior to going out to play to help you gauge wind speed. And remember - there is no such thing as a one club wind!

Thanks for reading and I hope this information helps you better control your ball in challenging windy conditions.

Develop Your Skills

Getting better at golf should be fun! As I become a more experienced coach I'm finally grasping the role that skill plays in lowering any golfer's score. I think of skill as what you can do with your technique. What shots can you hit? How well can you control your golf ball? That's achieved with skill. Check out this drill that I came up with to not only help you become a better golfer, but also to help you have more fun while you practice...

We all need skills. Hopefully wicked skills! By giving yourself ONE opportunity to hit each of the shots required to complete this drill you are continuously challenging your ability to adapt to the requirements of each unique situation. Something real golf requires on every shot! The seven required shots are a big slice, a medium fade, a baby fade, a straight one, a baby draw, a medium draw and a big hook. Don't hit them in order, but mix it up. Real golf doesn't work in a neat and smooth progression - neither should your practice. Keep a score too. It will help you strive to achieve full marks! 

Add golf skills to your resume...

Add golf skills to your resume...

Give this drill a try the next time you go out to practice. In fact, any skill based challenge or drill you can come up with will help you to develop wicked golf skills that you can take out on the course with you to start shooting lower scores.

Thanks for reading.

A Long Swing or a Short Swing?

The good news is that either one can get the job done, but we cannot view these two very different golf swings through the same lens. There are certain fundamental differences that we must keep in mind. Watch...

For the shorter backswing:

  • Get the wrists, arms and shaft organized early in the backswing
  • The club should favor being laid off at the top
  • The lead wrist should be flat or bowed at the top

For the longer backswing:

  • There is more freedom in the backswing as player has more time available to organize in transition and on the way down
  • The club should favor being across the line
  • The lead wrist can be either cupped or bowed

I do typically prefer slightly longer swings over shorter swings, but above all else I prefer swings that work. If you look at the greatest players of all time you'll see significantly more long swings than noticeably short swings. I have also found that longer swings will typically produce faster club speeds. Never a bad thing!

Keep in mind that these are generalized ideas that have been found to work on the students I have been fortunate to coach over the years. They have also been verified by other coaches and a scientist or two, but they are not set in stone. The objective is always improved performance.

.

How to Stop Hooking

There are literally thousands of articles pertaining to getting rid of slicing or fading the golf ball, yet not much sound information to help golfers overcome hooking (and blocking)!

The video clearly illustrates what the primary causes are...

The dispersion drill will not only get you to improve the club path, but also encourage you to get the clubface pointing to the right of the target. Exactly the opposite of what you have been struggling with! With the feel from the dispersion drill you will no longer have the:

  • club path traveling too far from in to out
  • clubface closed to the path
  • have to rely on perfect timing to quality golf shots

Give this simple drill a try if you tend to struggle with blocks and hooks. If you enjoyed this video and article please share it with a friend who you feel might benefit from it.

Thanks for tuning in!


How to Practice: 3. SHOT

In this series on practice I have mapped out a plan to help each golfer take ownership of their technical upgrades (SWING), dedicate a portion of the valuable practice time developing skills by hitting unusual and ‘outside the lines’ type shots (SKILL) and now the time has come to bridge the gap between the practice ground and the course by turning our attention purely towards results (SHOT).

With this mode of practice there should be a constant changing of clubs, targets, lies and intent. Here the golfer should incorporate their pre-shot routine as they hit specific and on-course styled shots.

I’m a big fan of hitting irons to a specific side of a flag or target. Create scenarios in your head as you execute each unique shot.  There’s a deep pot bunker just in front and slightly right of this pin. I’ve got to keep this eight iron about twenty feet left… Drivers should be played down imaginary fairways from Augusta, Pebble Beach and Royal Troon, with trouble invariably looming on one side or both. Get into each shot just like you would on the golf course. Be sure to:

·      Change clubs after no more than two shots

·      Switch targets for every shot

·      Use your pre-shot routine just as you would on the course

·      Be specific with your intent for each shot

Don’t attempt crazy or unusual shots; we’ve already done that in our skill session. It’s time to step back inside the lines and play your go-to ball flight. For an added challenge you could even keep yourself accountable and see how many consecutive shots you can hit to the appropriate side of a target. Everything about this practice mode should simulate real, on-course golf. Play golf!

One final swing and the Open Championship is yours…

Be sure to read my two previous segments on practice:

How to Practice: 1. Swing

How to Practice: 2. Skill