No More Weak Iron Shots
/We've all heard the sound. And we've all felt it too. That sense when you literally melt a ball off the clubface and you know instantaneously that you've hit the shot you've been waiting for all day. That feeling is compression! To learn more watch this....
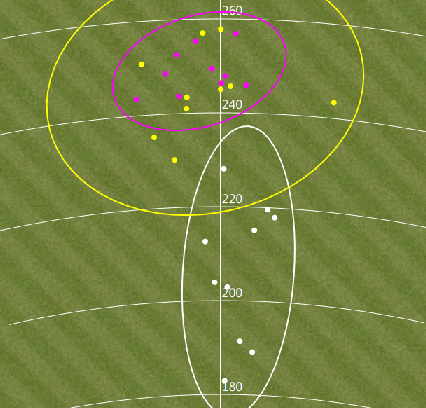
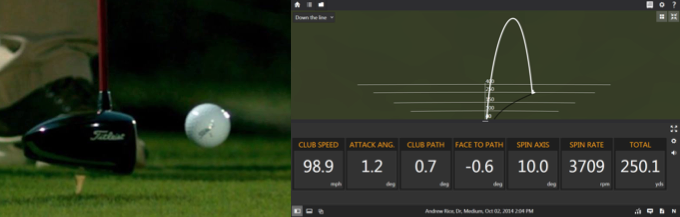
Here is an example lesson where I felt it appropriate to use this drill with a student who was struggling with the quality of his strike and high, weak ball flight in particular. Here is his initial TrackMan data for a typical 7 iron shot...
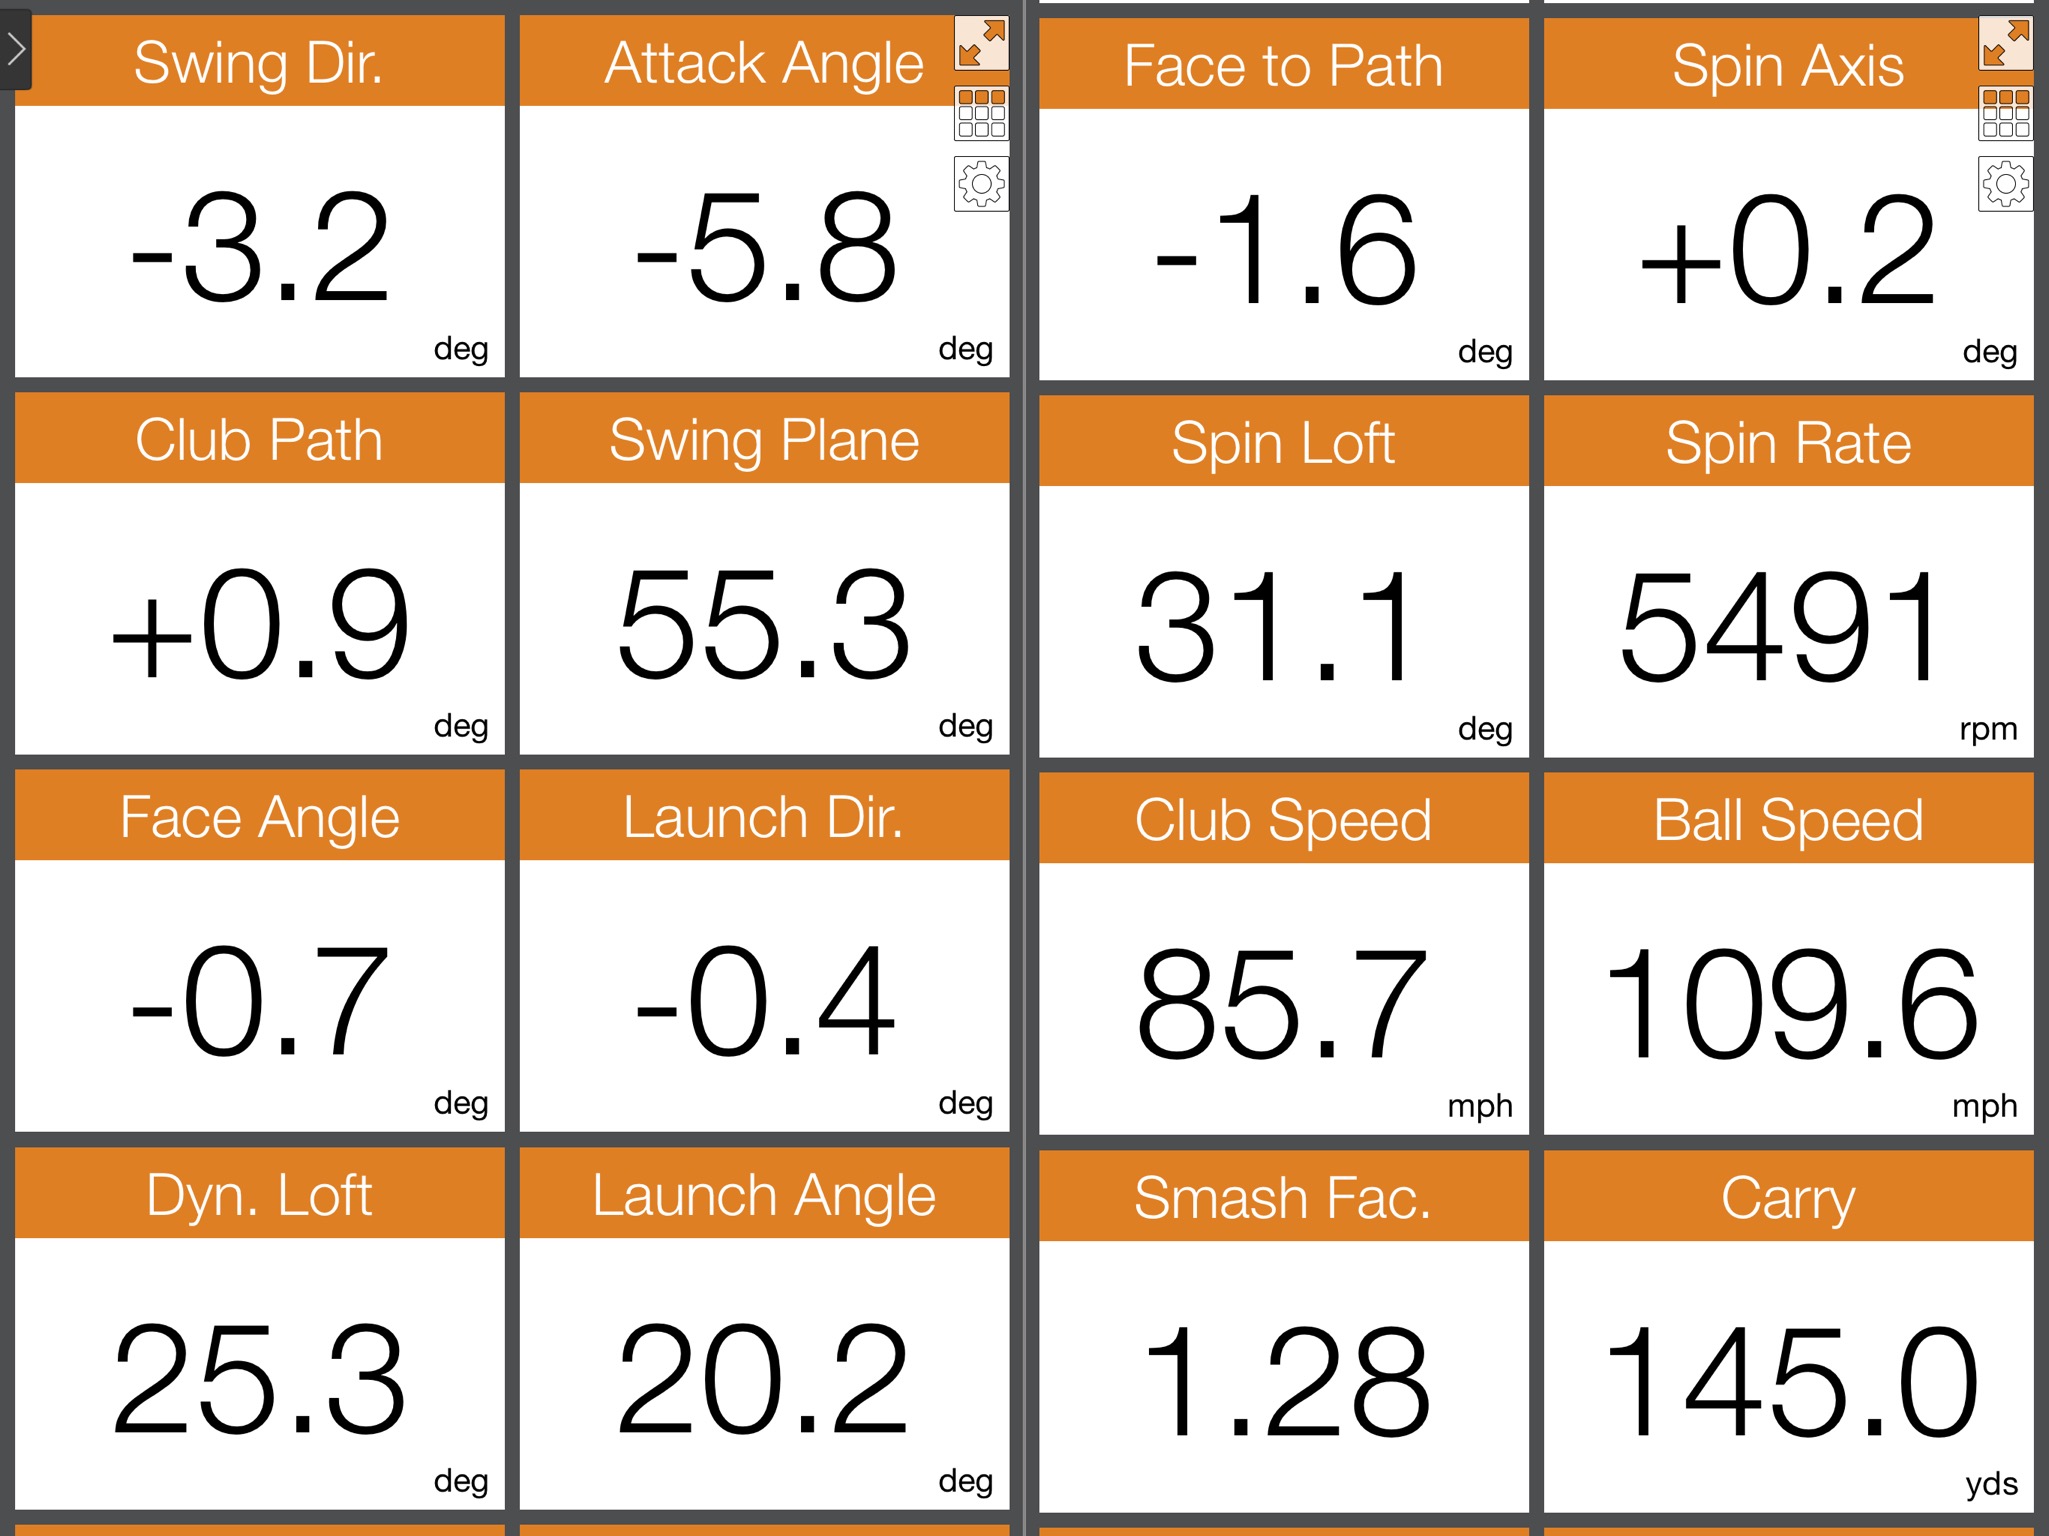
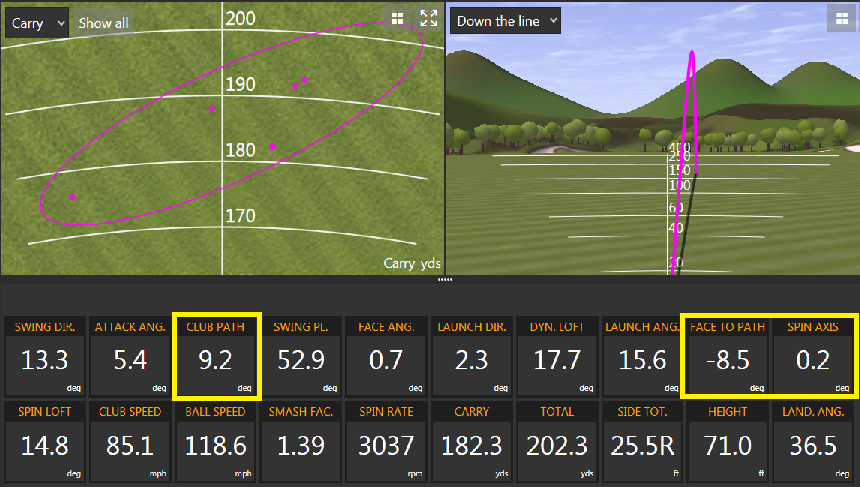
It's important to be aware that the height of this particular shot was 103 feet! This player's club speed is only a few mph short of PGATour average, yet he is only carrying a 7 iron 145 yards. After working on his compression (spin loft) via the drill illustrated in the video this is what a typical shot looked like in drill mode (note the slower club speed)...

The exact same ball speed with more than 7 mph less club speed! The spin loft, which is not an easy change to make, has gone from 31.1º to a slightly low 24.8º and the height has come down to a more manageable 76 feet. I anticipate that as this golfer works to get comfortable with their new feel they would increase their compression to a more appropriate 26º or 27º.

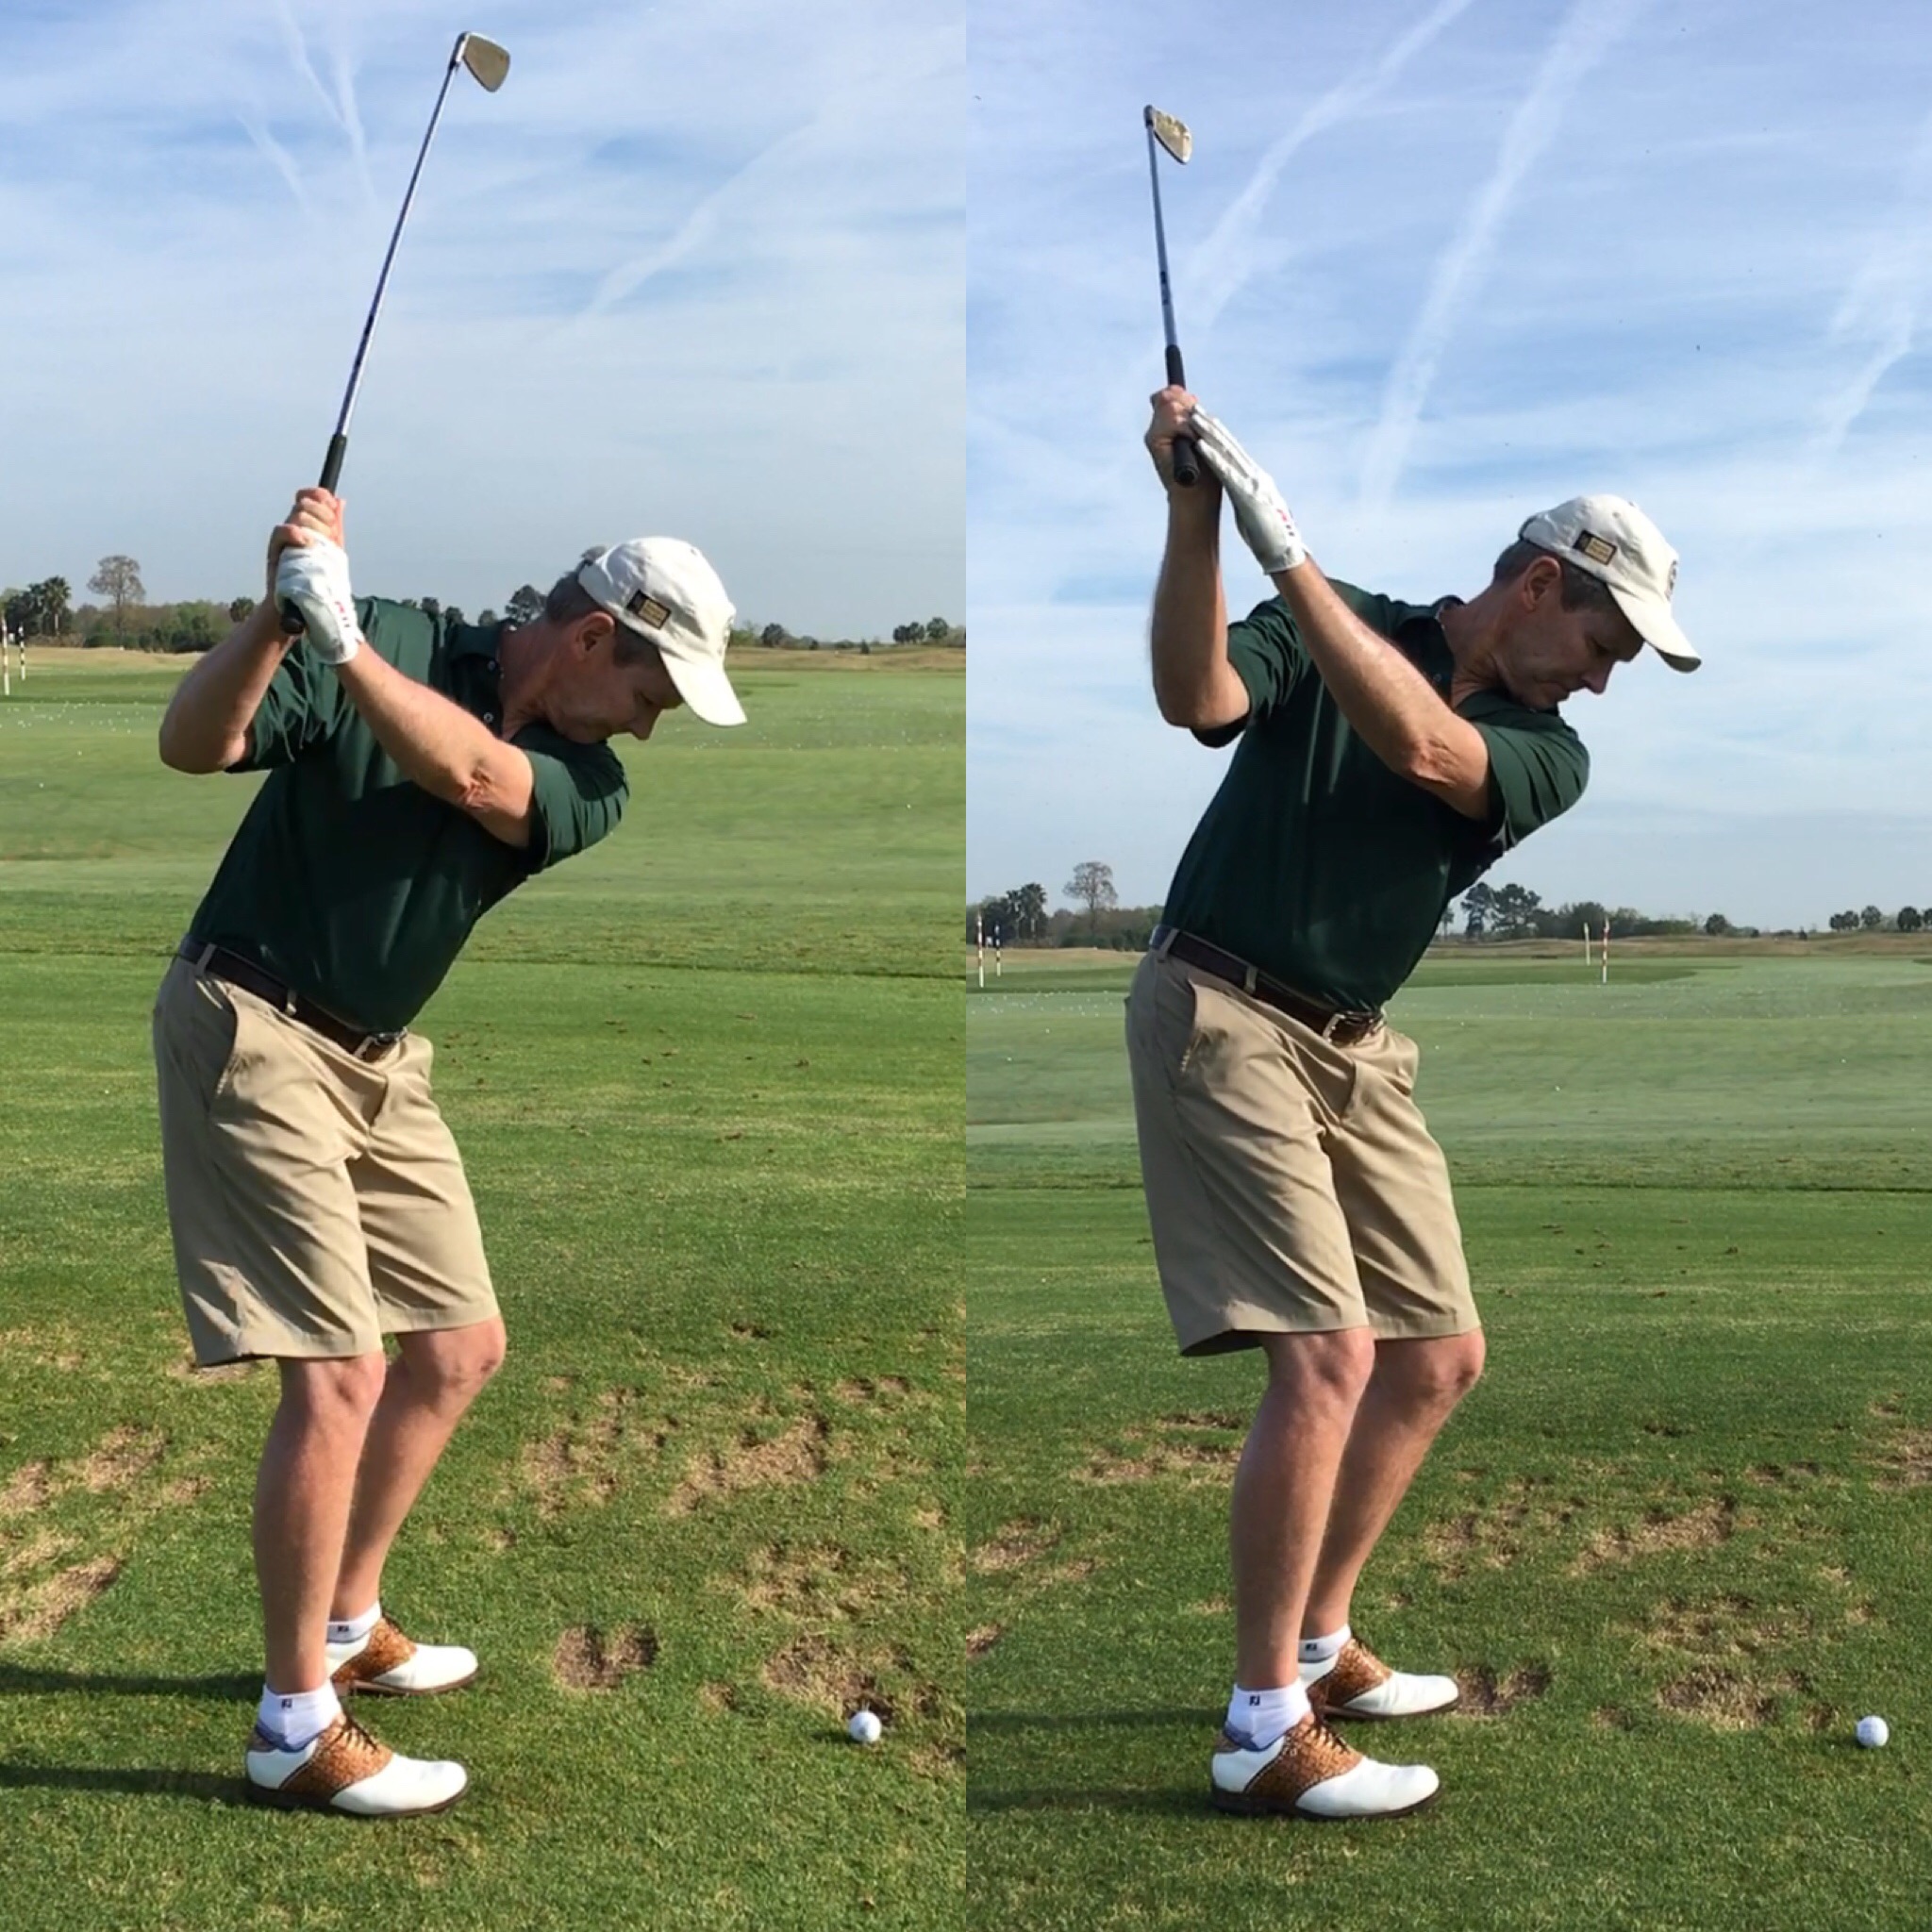
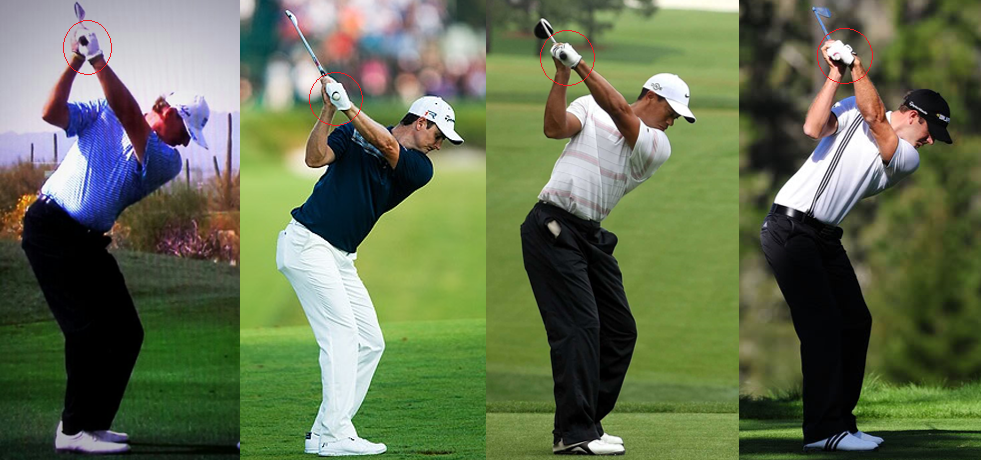
Before on the left and while doing the Compression Drill on the right
Thanks for reading and for greater understanding on what compression really is please read: