Club Face Matters

In the following video Andrew shares information on the most common fault he sees with the everyday golfer - an open or weak club face and the effect this one element can have on ball flight and striking.

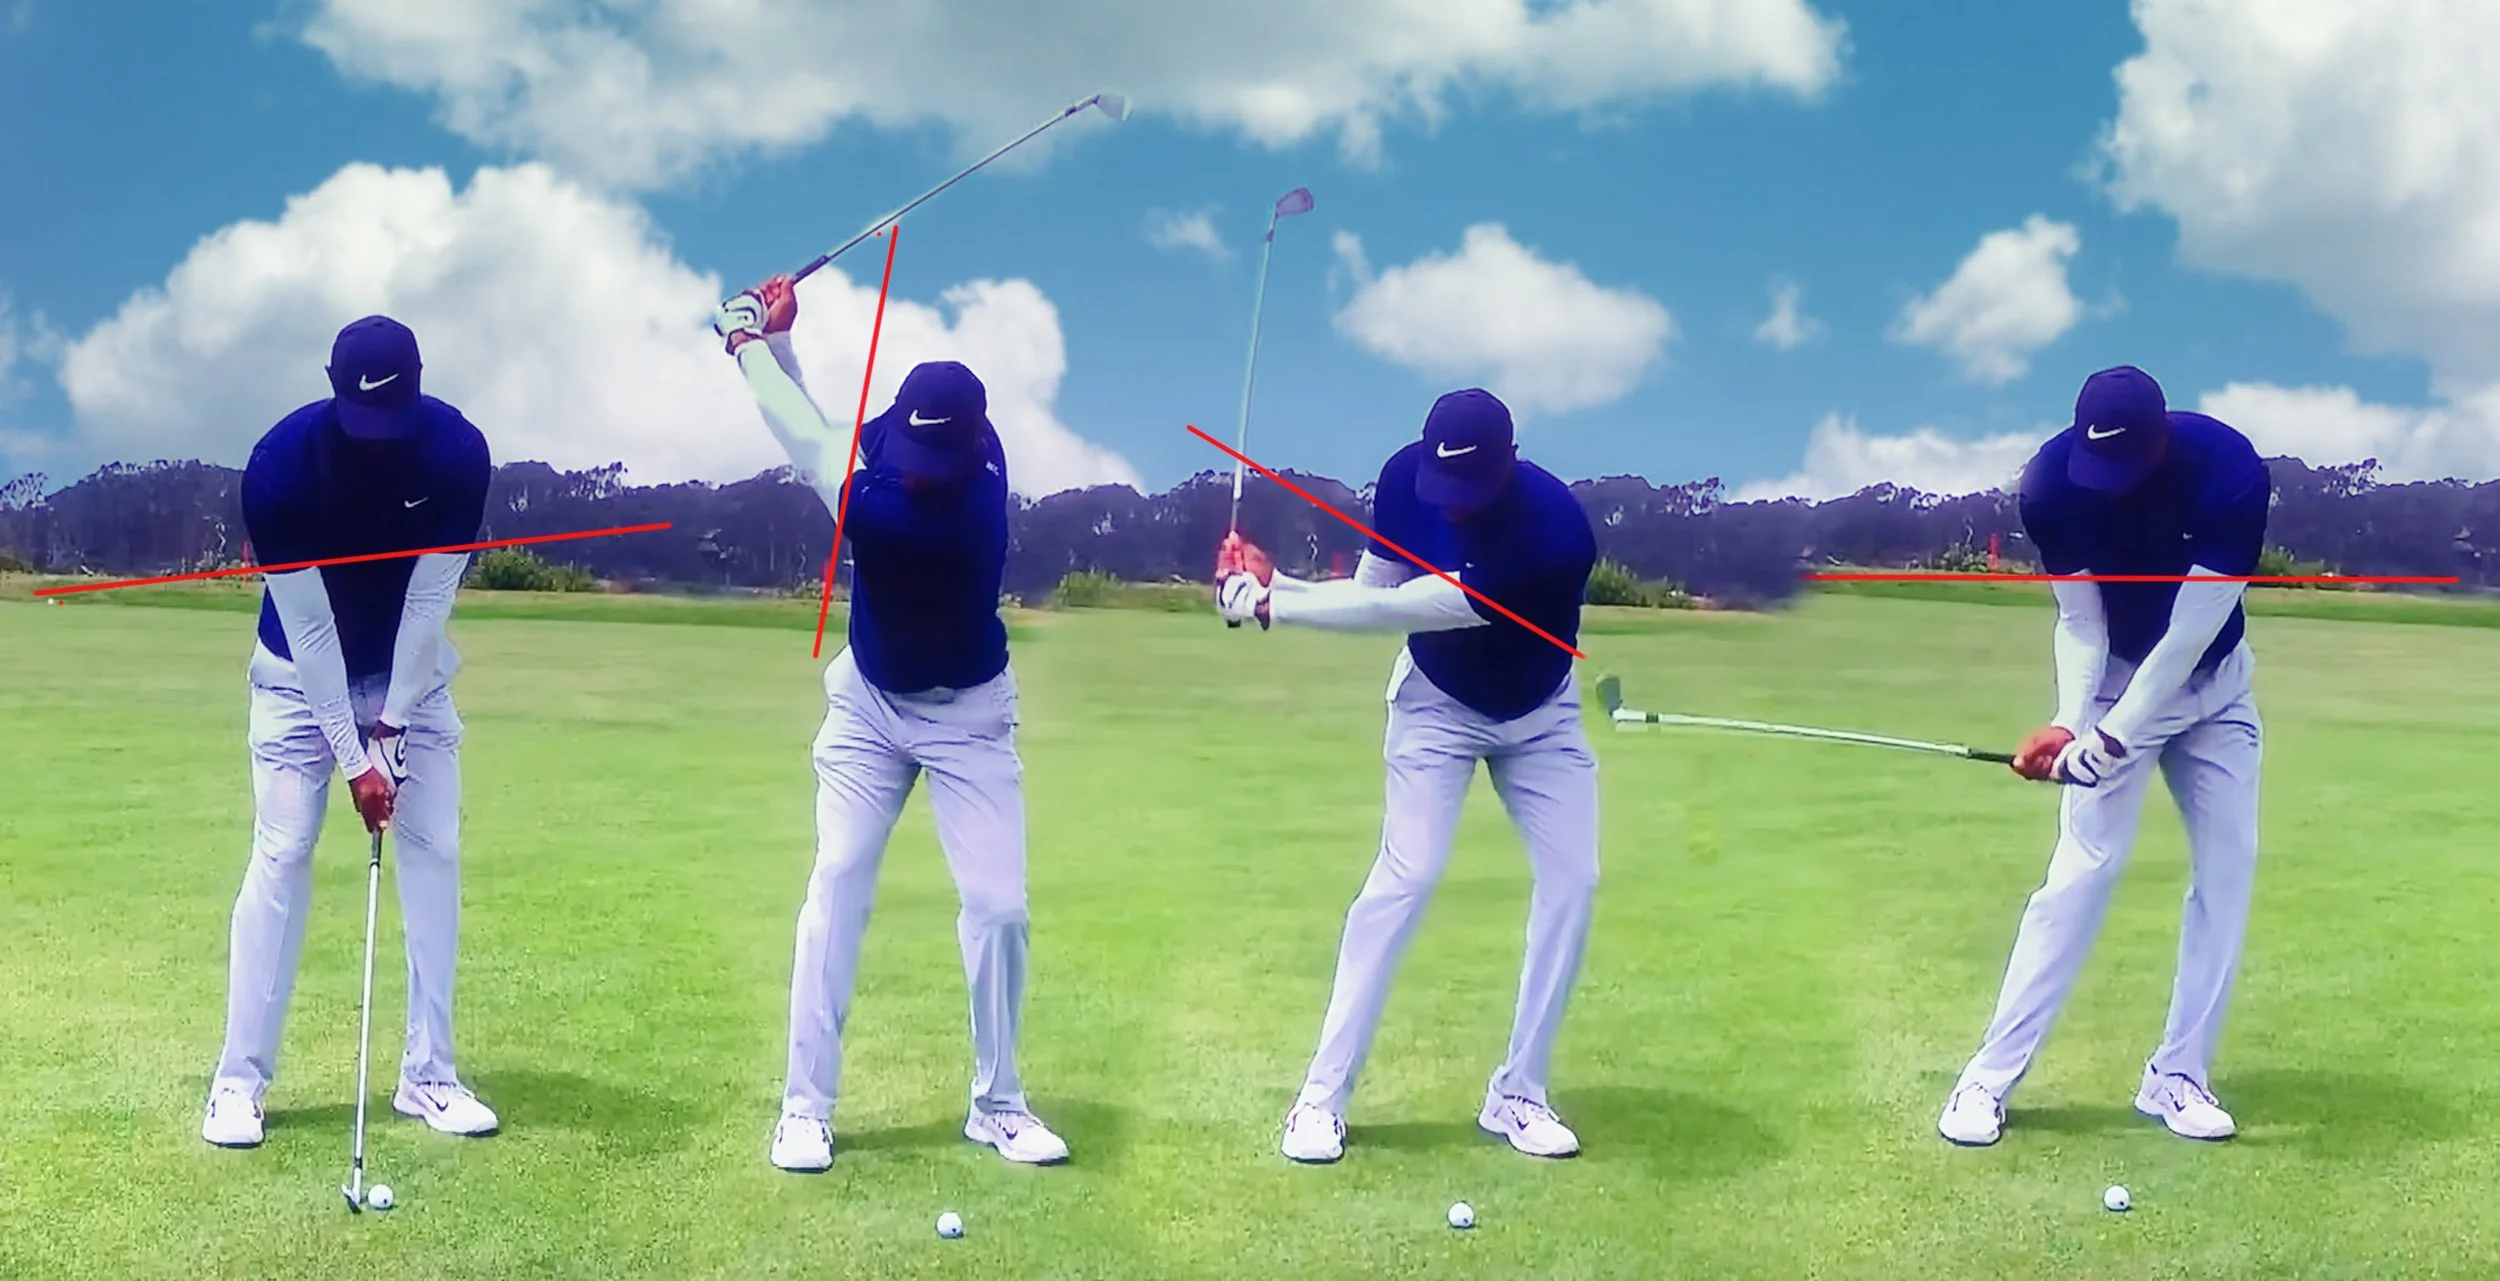
I have no doubt that the club face angle, in particular in the early downswing, is an integral element to playing good golf. All golfers need to get the face in place in the downswing in order to be able to make a quality strike and manage the face angle for accurate outcomes.

When the club face is overly weak/open:

  • The weight will typically stay back as the pivot stalls

  • The handle will be too far back at impact, resulting in high and weak shots

  • Distance and compression will be compromised

  • The strike will almost always be picky with very little club to ground interaction post impact

  • Trajectory will be overly high with the prevailing misses being pulls and/or fades

When the club face is overly strong/closed:

  • The hips will drive forward too far in an attempt to slow down face rotation

  • The hands will be well forward at impact, resulting in low spinning and low flighted shots

  • Distance will typically not be a problem

  • The quality of strike will often be acceptable

  • Appropriate height will be a challenge, especially with a longer iron and the prevailing miss will be a hot, low ball flight with a tendency towards blocks and hooks

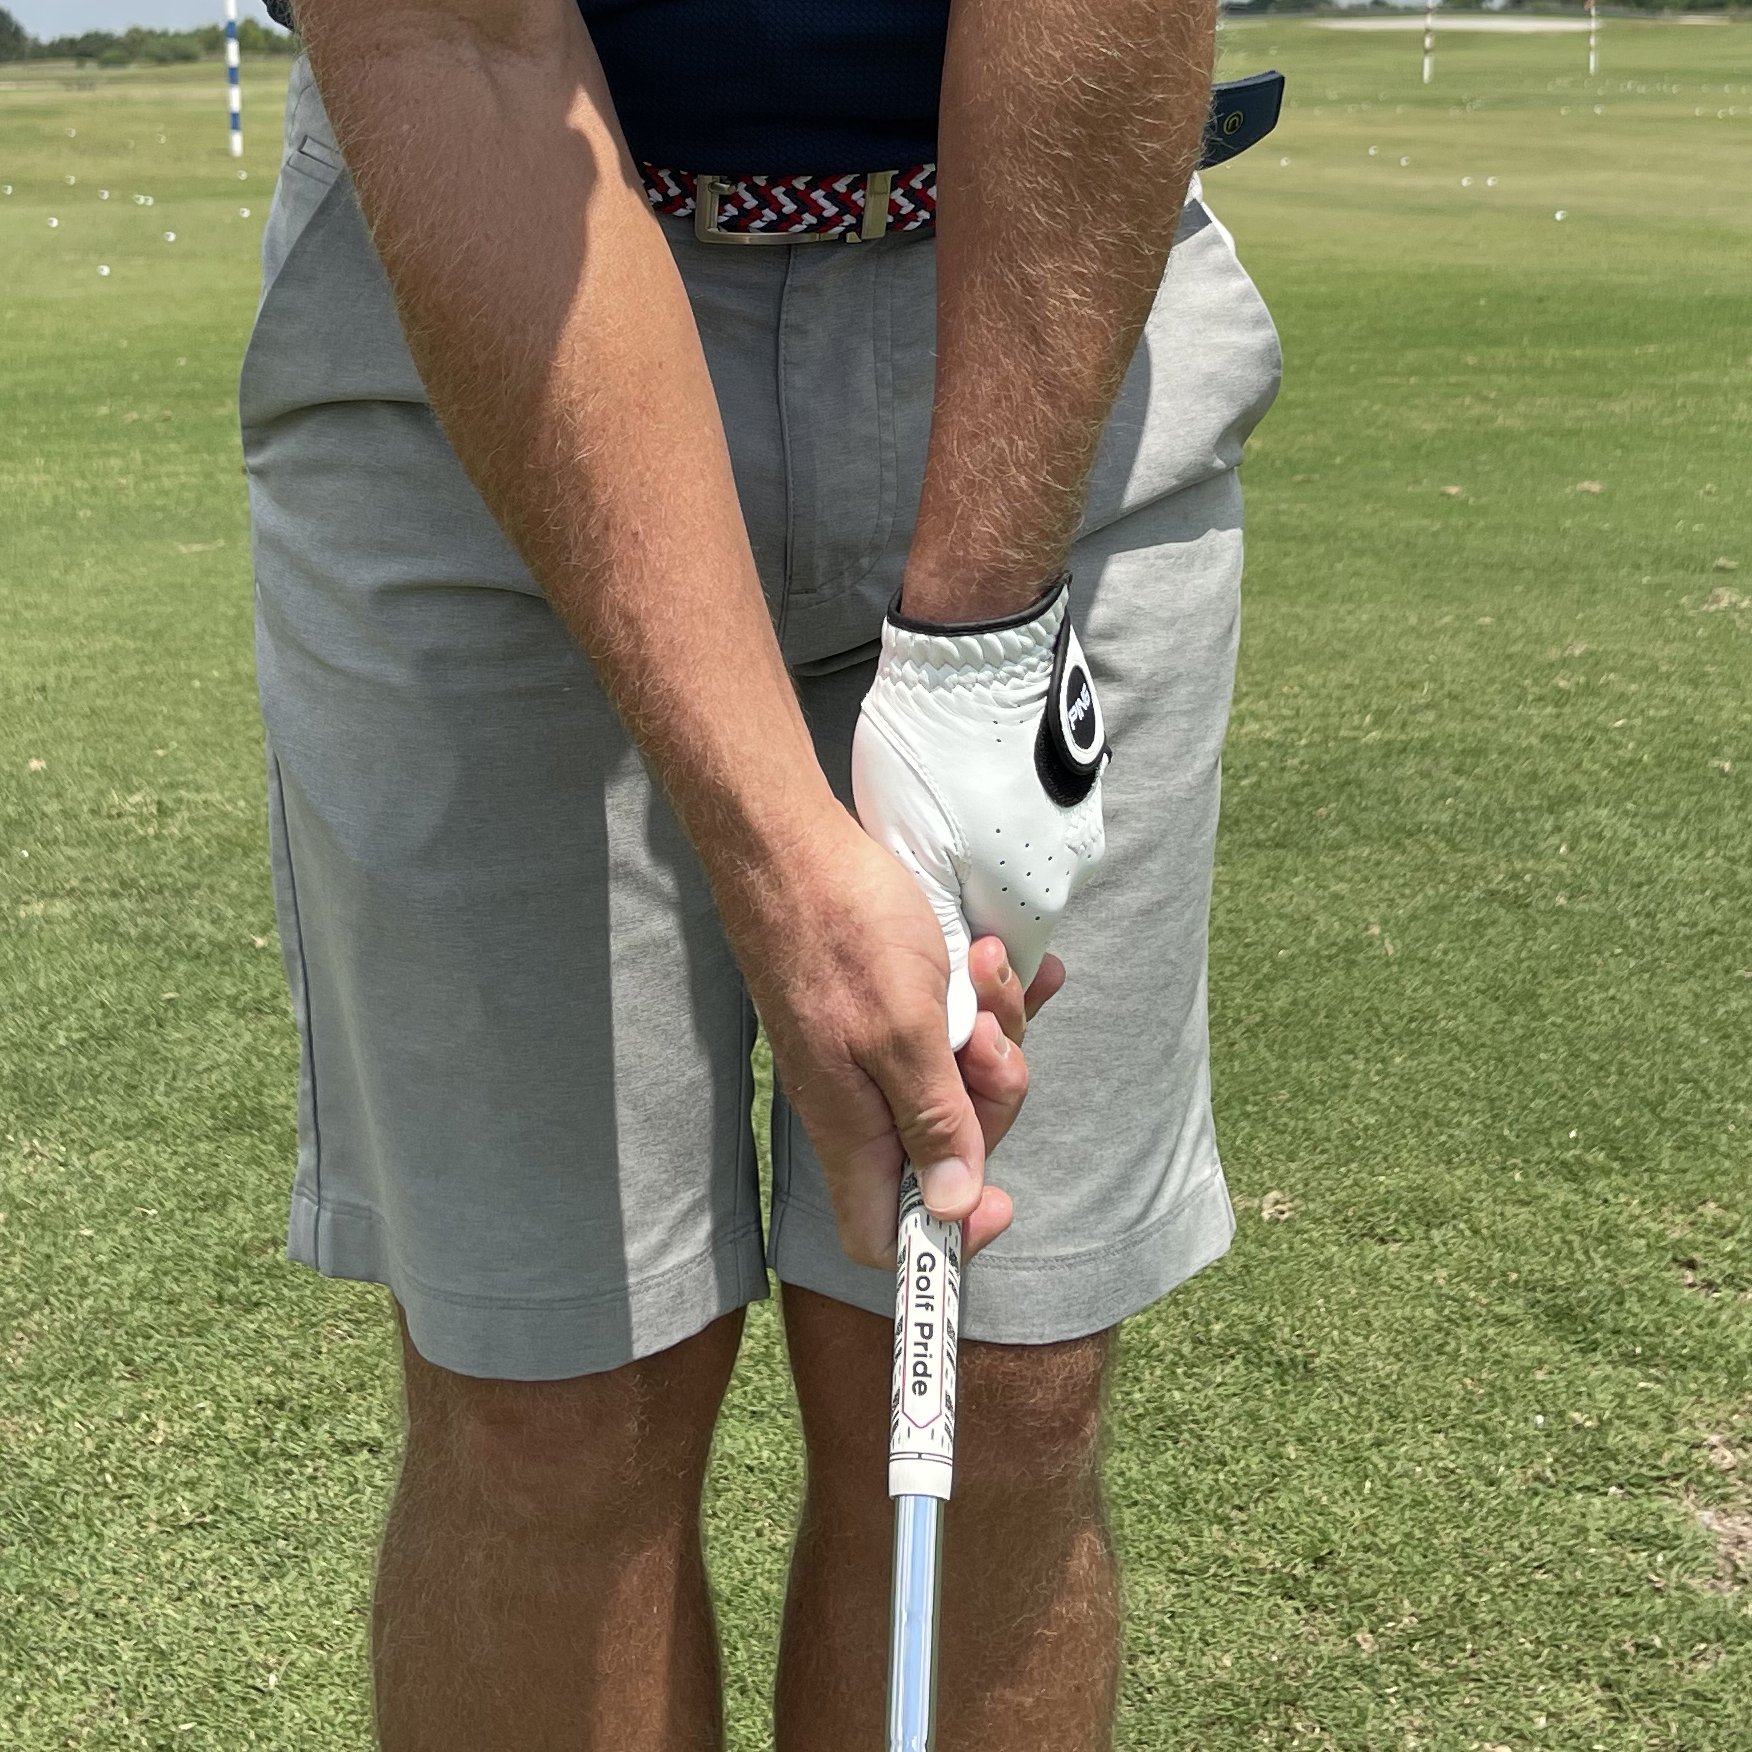
What can you do to improve? Take an honest inventory on which pattern discussed above you typically fall under. Once you have an idea, start working on improving your club face angle in the early downswing. This will most commonly be achieved with improved wrist angles, but know that the grip will also play a role. Create a game plan and set about making some long lasting changes. You can do this!!

Thanks for reading and please shout if you have any questions.

Fix Your Most Common Chipping Mistakes

The two most common mistakes I see golfers battle with when chipping are poor pace; the club head travels in a jerky fashion or at speeds that are often too fast for the requirements of the shot and they struggle to get the club to bottom out in the correct location relative to the ball. Pace and low point! Watch the video below and then let’s check in on some of the key points…

Here are a few points to take away:

Pace

  • Feel an even, ‘tick, tock” type pace as you swing the club back and forth

  • A good practice is to hit a few simple chip shots with a 7 iron. This will give you an excellent sense of what the pace should feel like

  • Try to feel the transition be as passive or gentle as you can. That change of direction needs to be silky smooth

Low Point

  • The practice rehearsals I demonstrated in the video are very important. Practice those both, away from the course and when playing

  • Feel your weight staying forward in the backswing as this will aid you in being able to shift the low point forward

As with anything, practice is integral to improvement. Try a few of those 7 iron shots in practice and don’t allow yourself to make a practice motion without having the intent of getting the club to bottom out of the target side of the ball.

I hope these ideas prove to be helpful to you and your enjoyment out on the golf course. Thanks, as always, for your support and readership.

Brett Rumford

How to Shallow the Attack Angle

I teach far more golfers that hit down on the ball too much more than those that don't hit down enough. If you are one of those golfers that typically takes big divots and hits a low ball flight then stay with me....

I have found this sequence to work nicely with all golfers looking to shallow their attack angle and improve the crispness of the strike. Try the following (with either irons or driver):

  • PHASE 1 - 5 drags over the top of the ball

  • PHASE 2 - 5 low to high pitch style shots, keeping clubhead low in the backswing

  • PHASE 3 - 5 half speed and half size swings sensing an ascending strike (even with irons)

(all shots are struck with the ball on a tee)

Another drill I like to use to help golfers learn to deliver an ascending strike with the driver is what I call the Box Drill pictured below...

Place an empty sleeve box between a teed golf ball and the target as indicated. The box should be approximately a grip length ahead of the ball. On a windy day it might be necessary to use tees to anchor the box in place. This is a costly addition to this drill!

If you can hit shots without running the clubhead into the box then chances are that you're no longer hitting down on the ball and you should see an increase in both distance and the altitude of your tee shots. Keep in mind that as you "upgrade" your attack angle, should you have an adjustable driver, you might need to alter the loft.

2023 US Open Wrap

Wyndham Clark won his first major championship on Sunday, shooting a final-round 70 to finish at 10-under-par for the tournament and hold off four-time major champion Rory McIlroy by one shot. The victory was a surprise for many, as Clark had never finished better than 75th in a major championship and had missed the cut in his previous two U.S. Opens. But Clark played steady golf all week, and hit some key shots down the stretch to hold off Rory. The difference to me was the 14th hole, where Wyndham hit a 280 yard second shot to 20 feet and Rory hit his 125 yard third shot into a bunker.

LACC started the week off in controversial fashion with two players shooting major championship record tying 62’s along with a host of other low scores, but redeemed herself as a solid US Open venue with some more moderate scoring over the last few days. It was however, the lowest scoring average in US Open history with 71.16. I have never played there, but despite a few negative player reviews, I liked the look and setup of the course for the week. I would have liked to see the short 15th play around 120 yards long on Saturday instead of the very short 80 yard shot they had it set up for.

Rory was so close, yet again! On Sunday he hit more greens than any other player yet turned in his worst putting performance of the week, losing 2.25 strokes to the field. Here are his strokes gained putting stats by round:

1st: +2.74 2nd: +1.89 3rd: -1.19 4th: -2.25

In a disturbing trend he seems to hit the ball well, yet perhaps rather conservatively, on major Sundays and putt poorly. The longest putt he converted in his final 22 holes was a 7 foot putt for par on the 16th on Sunday. It pretty much was St. Andrews all over again!

The golf course certainly favored the top drivers of the ball, with wider than normal fairways and firm conditions. I thought LACC handled the challenge of a US Open nicely, but I’m not sure I’d be eager for a return visit in the near future. It’s just tough to beat Shinnecock, Pebble, Brookline and Oakmont!

It’s crazy to think that we only have one more major to go for 2023. It’s just over 30 days until we get to see the top players take on Royal Liverpool and I for one, would love to see Rory grab another major championship. Finally!

What Affect Does Temperature Have?

We all know that the ball doesn’t travel as far when it’s cold and it seems to go a little farther when it’s really hot, but how much influence will temperature have on my carry distance?

Golf is a sport that requires skill, technique, and precision. One of the factors that can affect distance is temperature. Temperature can have a significant impact on the distance a golf ball will travel, as it can affect the ball's flight characteristics along with the golfer's swing mechanics. In this post, we will explore the effects of temperature on ball flight only. We don’t delve into the affect that all the extra clothing you’re wearing because it’s so cold will have on your ability to swing. This is only the effect of temperature on ball flight, not on our ability to swing the club normally when it’s either cold or hot.

Here is a chart that I created with the help of the engineers at PING. It’s super simple and easy to remember - just the way I like it!

Temperature Data:

  • Most of our club carry distances are acquired in temperatures close to 75º F (24º C)

  • For every 10º below 75º each club in your bag will CARRY (approximately) 2 yds shorter

  • For every 10º above 75º each club in your bag will CARRY (approximately) 2 yds longer

  • This is a rule of thumb to help you make better informed club selection choices

Please keep in mind that this does not factor in wind, altitude or the human factor of less/more speed generation in colder/warmer temperatures. This is strictly how the carry distance is affected in differing temperatures.

The primary reason for the differences we see is that temperature can affect the air density, which, in turn, affects the golf ball's flight. As the temperature increases, the air becomes less dense, resulting in a decrease in air resistance. This reduction in air resistance allows the golf ball to travel farther through the air. Conversely, as the temperature decreases, the air becomes denser, increasing the air resistance and reducing the distance that the golf ball will travel.

Temperature changes will affect the distance a golf ball travels. Golfers must be aware of the temperature, altitude, humidity levels, and their club selection to achieve the desired carry distance. Understanding how temperature affects your game can help you make better informed decisions on the course, leading to better scores and more enjoyable rounds.

A Better Way to Play in the Wind

This is my 4th version of a wind formula and for this one I recruited Chris Broadie, engineer with PING, for his insights and ability to model shots in windy conditions. Please note that we did not merely come up with an idea and throw it out there. We both put a fair amount of our expertise and understanding into this. I hope you take the time to watch this video and learn from the formula…

Wind Data:

  •  Gauge the wind by deciding if it’s 5, 10, 15 or 20mph. There is no need to be overly specific. Practice with an anemometer/wind meter will help calibrate the accuracy of how you gauge the wind. I use this model from Kestrel which I purchased on Amazon. Most golfers typically overestimate wind mph, but a quick weather app check will often serve as a good guide.

  • Headwinds: the mph of wind will be the yards to add to distance. For example, 10mph of wind adds 10 yards to the distance the shot will play.

  • Tailwinds: take half the mph of wind and make it the yards of distance to subtract. For example, 10mph of wind will subtract 5 yards from the distance the shot will play.

The above wind formula was created using fairly standard launch and spin conditions for everyday golfers. Keep in mind that wind performance is highly sensitive to trajectory and a higher trajectory will always lead to greater wind effect. Also, please keep in mind this is a rule of thumb to help you make better informed club selection choices. I am confident in it being fairly accurate for most golfers.


A Green Reading Pact to Save Strokes

Speed is king when it comes to putting and far too many golfers are wasting time and effort on trying to get the perfect read and line. Please watch the full 52 seconds of the following video for my full explanation…

The average PGA Tour golfer makes 1.5 putts from beyond 20 feet per tournament! Please read that stat again. They hardly make any longer putts and, unfortunately, neither do we. Of course we all make some, but let’s keep it real. When one goes in from the depths, celebrate and enjoy the moment. The key for most of us is to deliver the appropriate speed into the ball with a “good enough” idea pertaining to the line of the putt.

Putting Pact:

For all putts outside 15 feet I will simplify my green reading by selecting one of the five possible options: Straight; slight right to left or left to right; and big right to left or left to right.

We don’t need perfection when it comes to green reading as very few golfers actually start their ball on the intended line, but we do need speed and distance control when faced with these longer putts. My thinking here is that if we can mentally clear the way for more attention dedicated to the speed we will experience fewer three putts and be happier golfers…. and people!

Please give this one a try. I know you’ll perform better on the greens.

Lose Your Chicken Wing

If 2023 is going to be the year where you start compressing the golf ball with some sizzle and penetration off the club face then it’s time to get to work on that pesky little chicken wing you see at impact and beyond in your golf swing. It will take some time, but with a clear picture and a few solid practice sessions it can be done. Here’s how…

The two key areas are as follows:

  1. The club face is invariably the culprit here and its almost always overly weak or open. Practice the “pump drill” demonstrated in the video where you really exaggerate how closed you’re getting the club face. Yes, you’ll hit a few shots to the draw/hook end of the spectrum, but just the same way you learned to hit it “straight” with an open face, is how you’ll learn to hit it straight with a more neutral face.

  2. Let’s get DIRECT with this drill and make sure the lead arm stays extended. Keep in mind - face first and then the 9-3 drill demonstrated in the video. Use a 7 iron and keep the drill smaller than you might think. No need to hit it hard just yet. Please make sure that both arms are still extended as things come to a halt after the strike.

I know that if you commit to these two ideas you will not only improve the quality of your ball striking, but you’ll also get rid of the infamous golf swing chicken wing.

Please give this a go and let’s make 2023 your best year on the golf course ever! Cheers.

The Release! What it Should and Shouldn't Be.

I encounter many golfers who are unconsciously trying to manipulate the club face through impact in an attempt to keep the face square and the ball on line. They have a sense that holding the face off will somehow keep it square through impact. I get it, but the message I’d like all to get from this article today is that holding off when it is not required simply doesn’t work. In fact, I’m of the opinion that holding the face off actually decreases the golfer’s ability to control the face angle at impact. Watch this for a better understanding…

Here are a few notes to take away:

  • In the downswing the club face is always closing relative to the target. This is purely a function of the rotation inherent to the swing.

  • The release starts long before impact and is strongly influenced by the face angle in the early part of the downswing. An open face will encourage an early release, while a closed face will delay the release.

  • The lead wrist goes from flexion (bowed) to extension (cupped), while the trail wrist does just the opposite, just the same as if you were throwing a frisbee with your lead hand and a ball with your trail hand.

  • Semantics: a scoop is when a player adds loft and a flip is when a player is required to speed up the rate at which the face is closing.

Try the little exercise I demonstrated with the magnetic club face indicator. Start with one hand for a few swings and then add both for a few swings. Pay attention to how quiet the face actually is through the impact zone. Don’t swing too hard with the indicator on the club face or it will go flying! In real swings the feel should be that you are letting the wrists and clubhead fly in the downswing and through the strike. Throw it - hard!

Thanks for watching and please shout if you have any questions or comments. Happy Holidays from myself and my family to you and yours.

My Strategy Cheat Sheet

There are so many ways that golfers can improve without ever going to the range, gym, or taking a lesson. Better understanding and decision making is the low hanging fruit for improved performance and scoring. As a result I came up with my five part, strategy cheat sheet quite a while ago. Here you go….

The Five Yard Pact

Five yards is fifteen feet. If you hit any full swing shot to that distance from the hole, you’ve done nicely. My pact is simple. If you have a front pin, try to hit your shot 5 yards long. If you have a back pin, try to hit your approach 5 yards short, and the same goes for left and right pins. The only time the Pact is off is if there is a center pin and there are no “major” hazards around the green. However, if the pin is centered and there is a water hazard on the left edge of the green the Pact kicks in and you must plan for 5 yards right of the centered pin. Make sense?

You might wonder why you need the Five Yard Pact? These are some of the best players in the world trying to keep their golf ball between the left bunkers and the water on the 17th hole in the 2021 PGA Championship. Any more questions?
Stick to One Shot Shape

Yes, we all like to think that we can work the ball both ways, but all the data shows that we are “less good” at our atypical pattern than our regular shape. Play one shape on every tee and on every approach, unless you have an obstacle in your direct path. Moral of the story - dance with who ya brung and work on improving or upgrading your typical pattern on the range.

Get Out of Trouble in One Stroke

You have a handicap for a reason. It’s okay for you to make a bogey and still have a good day, but those BIG numbers can really taint your experience and score. Don’t be a hero and get the ball back in play and move on. You’ll be okay, I promise. Better golf is far more about limiting the damage than about being amazing.

Know Your CARRY Distances

It boggles the mind at how many golfers I encounter who don’t know how far they hit the golf ball with a certain club. They think they do, but most often they’re playing off of TOTAL distance vs CARRY distance. Oh, the number might also be slightly inflated too. GIR is a massive stat in lowering your scores, so pick the right club and start hitting more greens.

Putt When You Can

Once again there is no need to get cute or try to be fancy. Just because Rory might chip this one doesn’t mean you have to. You truly can limit the damage so easily, by simply putting when you have the chance to do so. And please, practice a few putts from off the green every now and then. It will go a long way towards subduing any doubts you might have.

Why do we, the regular, everyday golfer, need a better strategy? The above image from Lou Stagner at Arccos Golf should illustrate all we need to know. This is a plot of actual shots comparing 15 handicappers to PGA Tour players from 155 yards in the fairway. The broader our dispersion is the more conservative we need to be in selecting, and staying with, an appropriate target.

Thanks for reading along and I hope you leave with something to help you shoot lower scores.

Cheers!

3 EASY Keys for No More Slicing

While it’s not the bane of every golfer, slicing or ‘large fades’, certainly taunt the vast majority of golfers out there. If you commit to the following simple steps to help you overcome your nemesis I can guarantee you’ll no longer have a problem. Watch this short video…

The keys are:

  1. Get that club face as closed as you can possibly get for every ‘frame’ of your golf swing. That doesn’t mean you need a stronger grip, but I’m sure you need better wrist conditions in order to close that face down for the whole ride.

  2. Once you’ve got the face closed, now keep the body closed throughout the downswing. Feel like your back is to the target and it’s going to stay that way for the entire downswing.

  3. Glide! Glide on over to the front foot with some lateral weight shift. Make a positive effort to get your mass over to that front foot in the downswing - without unwinding or opening up.

Keep in mind that these ideas really are feels that will help any chronic slicer/fader to overcome their typical ball flight. If you struggle with this, or perhaps know someone who does (don’t we all?) then please give these ideas a try or share it with a friend that desperately needs it.

Thanks for reading/watching.

Trajectory Tune Up

My role as a golf coach is often to help my students neutralize the manner in which they deliver the club to the golf ball. I might help them with less slice, longer shots or simply a higher or lower ball flight. Today’s lesson will give a simple assist to any golfer looking to improve the trajectory of their shots. Whether you’re looking to hit the ball higher or lower the following video will help. Watch….

For a lower ball flight:

  • Hold the club in your lead hand and elevate the lead wrist

  • Place the trail hand on the club so that it is less ‘on top’ and more ‘alongside’ the grip

  • Have a sense throughout the swing that the club face is stronger and more downward

  • This will often reduce fade bias and improve compression and energy transfer from the club to the ball

For a higher ball flight:

  • Hold the club in your lead hand and lower the handle

  • Place the trail hand on the club so that it is more ‘on top’ of the grip

  • This change will often lead to reduced draw/hook bias and improve carry distances

As with any change it is important not to overdo either of these changes. Start small and if you need more you can always add later. In recent years I’ve found that the trail hand grip plays a significant role in determining the face angle throughout a golf swing. This is a simple technique to make significant changes in trajectory and energy transfer to the golf ball.

Thanks for reading this and I hope one of these changes works wonders for your golf.

Cheers!

How to Get the Most from a Golf School

I have been blessed to teach several hundred golfers each year for the last six or so years in a Golf School setting and as a result I’ve learned a tremendous amount about how any golfer can make the most of this special ‘golf education and vacation’ experience.

Beyond the basics of sunblock, a big hat, finger tape and lots of hydration, my intent with this article is to share a few ideas and concepts you may not consider as you prepare for your school. Some people do this, but most don’t. I feel that we could all benefit from this approach…

  1. Write down five important notes or objectives that you feel your coach should be aware of. This will serve as your list of the things you hope to upgrade during your time together.

  2. Manage your expectations. You will not be a scratch golfer at the end of the school, but you will certainly have the necessary tools to start making improvements in the upcoming weeks. Remember that frustration is the product of unreal expectations!

  3. Don’t come flying out of the gate on the opening day and burn yourself out. Pace yourself. This is going to be an environment where you will most likely hit more golf balls than you’ve ever hit in a two or three day period, so take it easy. You will get the job done!

  4. Failure is part of the learning process - embrace the challenge and how strange the changes might feel. If you fail early, it doesn’t mean you can’t do it, it just means you are not yet accustomed to doing it properly. Look at how many things you’ve learned to do in your life. Nothing happens instantaneously.

  5. Keep an open mind. You are here to change and part of that evolution might mean letting go of some long held opinions and beliefs. Knowledge is powerful and the quality of your golf IQ is going to be elevated.

  6. Be curious and ask questions. The last thing you want to have happen is to get home and regret not asking about that new wedge or how to stretch before going out to play. It might be good to build a list of questions you hope to have answered during the school.

Before I started teaching golf schools I used to think there would be too much information dumped on the student. They couldn’t possibly absorb all this STUFF! Thankfully, my experience has been completely the opposite. I have had more success with my Three Day Golf School than just about any other form of teaching I do. Why is that you might ask? I believe the reason is due to the fact that the golfer gets to hear the same theme and concept for three straight days versus just for an hour here and there. They simply cannot escape the fact that their coaches will not let them get away with the “old” version of their game and as a result the upgrades start to take hold.

Should you decide to attend a Golf School, above all else enjoy yourself. What could be better than a golf education vacation? Book some great restaurants and be sure to interact and chat with the like-minded folks who have joined you in the school. It will only make for a memorable and effective experience.

Thanks for reading.

Elevate Your Shortgame

Move the upper body up through impact when chipping. Wow! This idea is relatively new to golf instruction and very new to most golfers. Far too many everyday golfers are doing their utmost to stay down through the strike as the clubhead approaches the ball. Staying down only stalls rotation and forces the arms to collapse. Please don’t do that!

Please watch the above video a few times and really pay attention to what the chest and upper body are doing as the club gets close to impact. Ideally I’d like to move up more as I know all of the following great golfers do this: Stricker, Woods, Ballesteros, Spieth, Day, Na and Zalatoris. Quite a handy line-up there if you were building a team of world-class chippers!

Know that as you experiment and try to implement this into your chipping motion it will feel strange and you’ll never be moving up as much as it feels like you are. Have a friend take a video and keep chipping away - you too can be like the Jeffersons and move on up.

Have fun with this idea and please give it a try. I’d love to hear from you how it worked out for you.

To learn more about how to wield your wedges around the greens check out my Wedge Project HERE

A Drill for Better Strikes & Trajectory

This is a fairly straightforward drill that will activate the trail side in the downswing and reduce any “tipping” tendency that might get the clubhead stuck behind the golfer. If you struggle with thins, and fats in tandem with blocks and hooks, then this is one for you to try.

A few points to note:

  • This drill works nicely with a 7 or 8 iron struck off a low tee.

  • Keep the stance fairly narrow and drop the trail foot back about a foot inside where you’d normally place it.

  • Rehearse and then rehearse again. Remember that as you practice this you’re trying to make technical changes, so go slowly and get it right….every time!

  • Try to feel the trail shoulder continuously moving through the impact zone. It should feel as if you’re “covering” the ball with that trail shoulder.

  • As you get more comfortable you can start to pick up the speed and move the back foot into a more neutral position.

This drill really has worked wonders for a few of my students in that it has upgraded both the quality of strike along with the ball flight. The next time you find yourself struggling with either strike or trajectory give this drill a try. I think you’ll be pleasantly surprised.

Rotation Drill

Most of us should be working towards better rotation through impact. One of the biggest differences I see between the everyday golfer and the pros is the amount of hip rotation that has occurred at impact. What I call the “two cheek” impact position where both butt cheeks are visible from down the line at impact. This drill will help! Take a look…

Notes:

  • Grab an 8 or 9 iron and set up to the ball which initially should be on a tee.

  • Wind about halfway back into the backswing and pump down to where the shaft is approximately parallel to the ground. Here you should feel your chest and hips as open as you can possibly get them.

  • After a few rehearsals give the ball a light hit and slowly build up speed while incorporating this sense into full speed swings.

Let’s keep in mind that in order to be able to rotate more freely through impact is largely an indicator of the clubhead and club face being in an acceptable position in the early part of the downswing. If your club face is wide open and you try to rotate more through impact there’s a strong chance you’ll actually hit the ball worse! Start with getting the clubhead deep in the early downswing and the club face fairly strong - from there this drill will work wonders for your ballstriking.

Thanks so much for watching/reading along. I hope that in some small way I am able to contribute to the joy you experience out on the links. Until next time…

Better Ballstriking!

It has been incredible to watch my students work this concept into their golf swing and witness how much better they start to strike the golf ball. It’s ball first, crisp contact where the compression improves almost immediately. If you struggle with thins, scrappy heavy hits and even some blocks and hooks then this thought is a good one for you to try. As always there is a video coming, but today I’m going to lead off with what I’d like you to feel….

  • As you get to the top of your backswing your lead/front side is lower than the trail side. In transition I want you to keep the lead side low for as long as possible into the downswing

  • Feel like you’re “surfing down the wave” into the golf ball

  • Work against drifting the upper body in front of the ball. There should be no upper body sway as you start down

  • While the lead side will elevate at impact, strive to keep that front shoulder staying as low as possible

As you can see in my demonstration above I tend to get my upper body too far forward while I’m ingraining the FEEL, but notice what the upper body does during the actual shot. That’s a little more like it!

I hope that these articles are somehow contributing to your enjoyment of the game. As we all know - better shots lead to greater enjoyment. Thanks for checking in!

Try the BOX Drill

If you struggle with heel strikes or worse yet the shanks, then this drill is for you. Swing too far from in to out? Too far from out to in? This drill is for you. It is, quite simply, the kind of drill that so many golfers should utilize as their staple practice drill whether they are warming up or just getting some solid practice in.

A few points to note:

  • You can use a club box, a 2x4 (be careful!) or a partially empty plastic water bottle laying on it’s side

  • Align the box at the target

  • Tee the ball up approximately 2” inside the box

  • Start off with shorter irons and work your way up to the bigger clubs

This is a super drill for everybody! Keep the box in your trunk or locker and use it fior a few shots every time you’re warming up or practicing as it will always serve to give you a clear indication of a fairly neutral strike and club path - bot good things.

Thanks so much for your readership and support in 2021. It has once again been a fairly challenging year, but I cannot be more grateful for my family, friends, students and the career path that I have chosen. Here’s to making 2022 your best year in golf yet!

Cheers.

Tilts & Turns!

If you want the ball to get moving you’ve got to get your body moving and this very simple exercise is a little gem that we all should be practicing on a regular basis. I find it to be an excellent reminder of the tilts, turns and stretches we need to incorporate into the golf swing. Watch…

A few checkpoint to keep in mind when doing the exercise:

  • Hold a club across your shoulders by crossing your arms across your chest

  • Position the handle of the club on the lead/target side of your body

  • In the backswing get the handle to point at the ball or where the ball would be

  • Allow the trail side to extend and the trail knee to straighten

  • The lead side should feel low and the trail side high as it stretches and extends

  • Repeat these feels as the swing moves into the downswing and follow through

  • In the post impact portion of the swing the trail side lowers/shortens while the lead side will elevate and extend

This exercise does such a good job at reminding us what a real swing should FEEL like. While the positions of the drill are a little extreme they carry through nicely into an actual shot. I know this simple, take home exercise will go a long way towards helping a large percentage of the golfers that show up on my lesson tee. Give it a try!

Try This for Better Compression

Too many golfers that I teach are struggling to compress the golf ball! There is a distinct lack of energy being transferred from the clubhead to the ball. Getting the club face in position in the early part of the downswing is tremendously helpful in increasing compression and the sizzle factor off the face. Here’s how…

When trying this drill look for the following:

  • Don’t try to hit balls with this - it’s all about getting the correct feel

  • Hold the club at the bottom of the grip in your lead hand with the clubhead well off the ground

  • As you get to the top you should see the handle out in front of your forearm

Doing this drill correctly will ensure that you’re getting both the club face and the clubhead in a good spot to initiate the downswing without having to work hard to shallow the club or lay the shaft down.

This should be your view when you have the club at the top of the backswing. Give it a try and see if you can incorporate the feel into your next practice or warm-up session.

Thanks for reading/watching along and it is my wish that somehow I can manage to share something that helps you experience more joy while you’re out on the links.

Cheers!